Crispy Indian Fish Cutlets That Steal the Show Every Time
Indian fish cutlet recipe with spiced flaked fish, crispy breadcrumb crust & soft filling. Easy homestyle snack ready in 50 mins. Get the full recipe now.
 Tripti Srivastava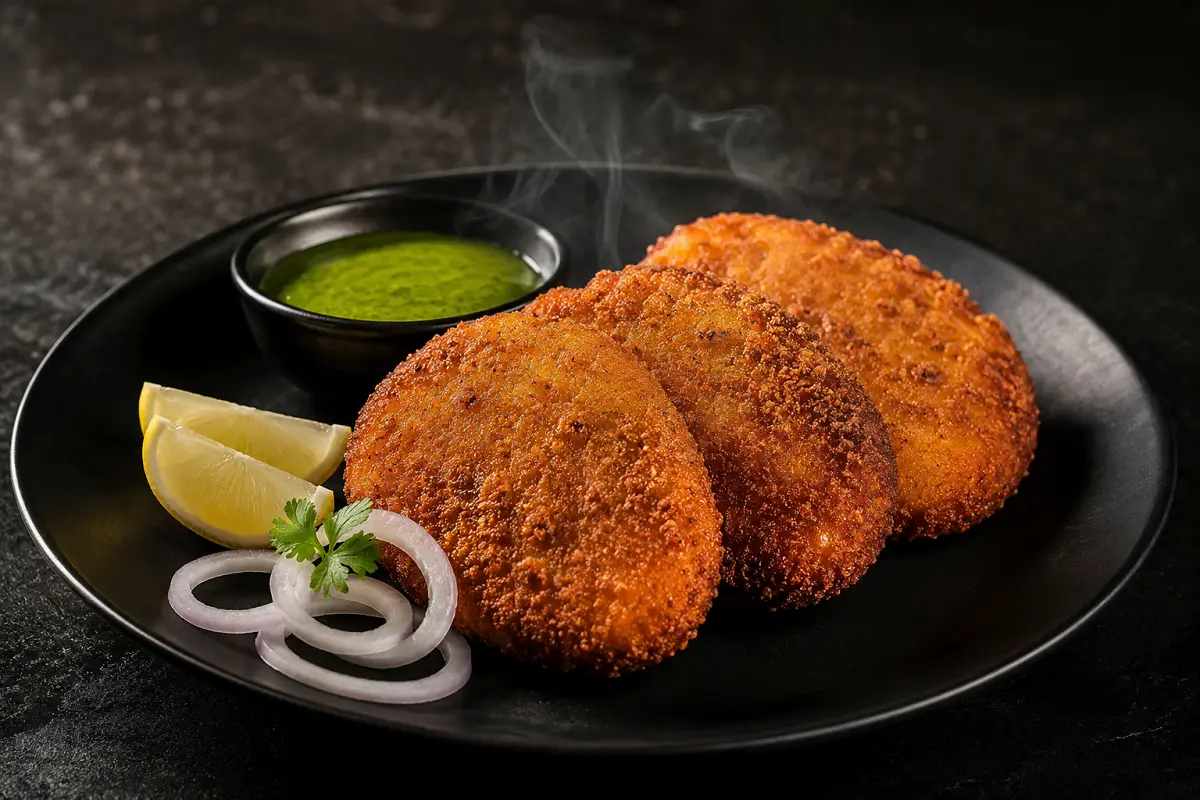
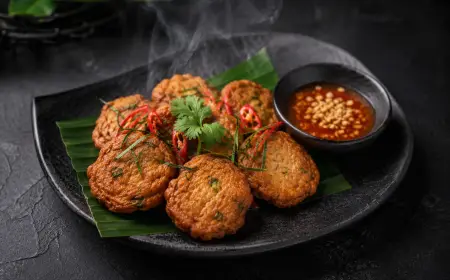
There is something about the smell of fish cutlet frying in a pan that makes everyone in the house suddenly appear in the kitchen. That golden sizzle, the warm hit of garam masala and curry leaves, the crunch when you bite through the crust and reach the soft, spiced filling inside this Indian fish cutlet recipe is one of those dishes that feels like a celebration even on a perfectly ordinary Tuesday evening. Whether you are making it for a crowd or just for yourself with a cup of chai on a rainy afternoon, this recipe is going to become a regular in your kitchen.
I grew up watching my aunt make fish cutlets every time there was a family gathering. She never measured a single ingredient, but those cutlets were always perfect never falling apart, never bland, always with that satisfying crunch. Over the years, I tested and retested until I understood exactly why hers worked so well. The secret, as it turns out, is not a magic spice it is mostly about getting the moisture right. Dry fish, dry potatoes, and a mixture that holds its shape before it ever touches the oil.
This recipe is my most-made version, and I am sharing every detail with you including the bits that most recipes skip over. By the time you finish reading, you will know not just how to make these cutlets, but why each step matters.
What Makes This Indian Fish Cutlet Recipe Special
Fish cutlets might seem simple, but small decisions at every stage make a big difference to the final result. Here is what makes this version reliable and worth making again and again.
- Real flaked fish, not canned shortcut. This recipe uses fresh or frozen fish fillets that you cook and flake yourself. The texture is far superior meaty, moist, and actually tastes like fish rather than a tin.
- Balanced spice profile. The spice mix here is warm and layered not aggressively hot. Garam masala, black pepper, ginger, and green chilli work together to complement the fish without drowning it out.
- Crispy double-coat crust. A quick double-dip in egg wash and breadcrumbs gives you a crust that stays crunchy for a good 10 to 15 minutes after frying long enough to serve at a table without rushing.
- Freezer-friendly by design. You can shape and coat a full batch, freeze them uncooked, and fry straight from frozen whenever you need them. Perfect for surprise guests or a quick after-school snack.
- Works with whatever fish you have. Kingfish, salmon, tilapia, rohu, catfish, tuna this recipe adapts to almost any firm white or oily fish fillet you can get your hands on.
Indian Fish Cutlet Recipe Ingredients Overview
The hero of this recipe is the fish, so use the freshest you can find. Firm white fish fillets like kingfish (surmai), tilapia, or basa work wonderfully because they flake cleanly and hold their texture after cooking. If you prefer oily fish, salmon and mackerel add a richer, deeper flavour to the filling. Canned tuna is a perfectly acceptable shortcut on busy days just drain it very thoroughly and press out as much liquid as possible before using.
Boiled and mashed potatoes play a critical supporting role here. They bind the filling together and soften the overall texture of the cutlet so it does not feel dense or dry. Keep the mash dry watery potatoes are the number one reason fish cutlets fall apart in the oil. After boiling, let the mash sit on an open plate for 10 minutes to release steam before you use it.
The flavour base is built with onions, fresh ginger-garlic paste, green chillies, and curry leaves. Curry leaves are not optional here they add a faintly citrusy, toasted note that you simply cannot replicate with anything else. If you genuinely cannot find them, substitute with a small amount of fresh lime zest, but do try to track them down. The spice powders turmeric, coriander powder, black pepper, red chilli powder, and garam masala are added in modest amounts. Fish does not need heavy spicing. You want seasoning that enhances, not overwhelms.
For substitutions: swap green chillies with a pinch of cayenne if you need more heat control. Replace all-purpose flour dusting with cornstarch for a slightly crisper initial coat. Use panko breadcrumbs for an extra-crunchy exterior. For a richer crust, add a tablespoon of sesame seeds to your breadcrumb plate.
How to Make It
The process follows a clear, logical sequence: cook and flake the fish, boil and dry the potatoes, sauté the spiced onion base, combine everything, cool the mixture, shape the cutlets, coat them, and fry until golden. Each stage takes about 10 minutes, and most of the work happens in the first half of your time in the kitchen.
The second half shaping, coating, and frying is almost meditative once the mixture is ready. Lightly oil your hands, press each cutlet into shape, run it through the egg and crumbs, and set it on a tray. The frying itself is quick: about 3 to 4 minutes per side on medium heat until the crust turns a deep, even gold. The full directions are below follow them in order and you will not go wrong.
Tips for Best Results
- Cook the fish until completely dry. After poaching or pan-cooking the fish, flake it and return it to low heat for 1 to 2 minutes to drive off any remaining moisture. This single step prevents your cutlet mixture from becoming sticky and wet.
- Taste the filling before shaping. Season the mixture when it is still warm it is much easier to adjust salt and spice at this stage than after the cutlets are shaped and coated.
- Chill the shaped cutlets. Even 20 minutes in the refrigerator after shaping and coating firms the cutlets up significantly and keeps the breadcrumb coating from sliding off during frying.
- Medium heat is the sweet spot. Too hot and the crust burns before the inside is warm through. Too cool and the cutlets absorb oil and turn greasy. Medium heat with enough oil to reach halfway up the side of each cutlet gives you even colour and a cooked centre.
- Do not move them too soon. Once a cutlet goes into the pan, leave it alone for 3 full minutes before even checking the underside. Moving it too early breaks the crust and causes the cutlet to stick.
Serving Suggestions
The classic serve is a small bowl of green coriander-mint chutney alongside a tangy raw onion salad finely sliced red onion, a pinch of chaat masala, and a squeeze of fresh lemon. The brightness of both cuts through the richness of the fried cutlet beautifully. In Kerala, a splash of coconut vinegar over the onion salad takes this combination to another level entirely.
For a more filling meal, tuck two fish cutlets into a toasted soft bun with sliced cucumber, a leaf of lettuce, and a smear of green chutney for an easy fish cutlet burger. You can also serve these as a proper dinner starter plated on a wooden board with two chutney dips, a lemon wedge, and a light green salad alongside. Either way, pair them with a cup of masala chai for the definitive Indian tea-time snack experience.
Storage and Reheating
Fridge: Store cooked fish cutlets in an airtight container in the refrigerator for up to 2 days. To reheat and restore the crunch, place them in a dry non-stick pan over medium heat for 2 to 3 minutes per side, or pop them into an air fryer at 180°C for 5 minutes. Avoid the microwave it softens the crust and makes the inside rubbery.
Freezer: Freeze shaped and coated but uncooked cutlets on a parchment-lined tray until solid (about 1 hour), then transfer to a zip-lock bag and freeze for up to 3 weeks. Fry directly from frozen on medium-low heat, giving each side an extra 1 to 2 minutes compared to fresh. Do not defrost before frying it causes the coating to go soggy.
Variations and Substitutions
- Kerala Style (Meen Cutlet): Use kingfish or tilapia, cook in coconut oil, and add a small handful of finely chopped fresh curry leaves to the filling. Serve with a tangy onion salad dressed in coconut vinegar and green chillies. This version is the one that shows up at every Kerala wedding and Easter feast.
- Bengali Fish Chop: Use rohu or bhetki (barramundi) fillets, add a pinch of freshly ground Bengali garam masala (cinnamon, cardamom, and clove), and shape them into slightly flattened oval patties rather than round discs. Serve with kasundi Bengali mustard sauce for the authentic experience.
- Canned Tuna Shortcut: Drain two cans of tuna in water thoroughly, pressing out every drop of liquid, and use in place of fresh fish. Reduce the cooking time for the filling since the tuna is already cooked. The flavour is slightly milder but the cutlets are just as satisfying.
- Baked Version: Brush shaped and coated cutlets with oil on both sides and bake at 200°C (390°F) for 20 to 22 minutes, flipping once at the halfway point. The crust will not be quite as deep-golden as pan fried, but the flavour is just as good.
- Air Fryer Version: Lightly spray coated cutlets with oil and air fry at 180°C (360°F) for 13 to 15 minutes, flipping halfway through. This is now my go-to method for everyday cooking minimal mess, great crunch.
- Gluten-Free Option: Use gluten-free breadcrumbs or finely crushed rice crackers for the coating. Replace the all-purpose flour dusting with rice flour or cornstarch. Check that your spice blends do not contain wheat-based fillers.
Fish Cutlet Preparation Method
Start by poaching your fish fillets in a shallow pan with a little water, a pinch of turmeric, and salt. Cook on medium-low heat for 6 to 8 minutes until the fish is opaque and flakes easily with a fork. Drain, remove any bones, and flake the fish with a fork into small, even pieces. Return to low heat for 1 to 2 minutes to drive off any residual moisture, then set aside to cool. Meanwhile, boil the potatoes until completely tender, drain, peel, and mash smooth. Spread the mash on a flat plate to let the steam out and cool down fully before using.
In a separate pan, heat oil and sauté onions with curry leaves until softened and lightly golden. Add ginger-garlic paste and green chillies, cook for a minute, add the spice powders, and stir for 30 seconds. Add the flaked fish and fold everything together gently. Cook on low heat for 2 minutes, then take off the heat and stir in fresh coriander and a squeeze of lemon juice. Let the entire mixture cool to room temperature before mixing in the mashed potato. Once combined, taste, adjust seasoning, and the filling is ready.
Standard Operating Procedure (SOP)
For consistent results every single time, follow this order without skipping steps: poach and dry the fish → boil and dry the potatoes → make the spiced sauté base → combine and cool completely → shape → dust → egg wash → breadcrumbs → chill → fry on medium heat. The two most critical points in this sequence are drying the fish and cooling the mixture before shaping. Everything else is flexible but those two steps are non-negotiable if you want cutlets that hold together and fry properly.
When making large batches, work in an assembly line. Shape all cutlets first and lay them on a tray. Then run the entire tray through dusting, egg wash, and breadcrumbs in one pass rather than coating each individually. This keeps the process efficient and ensures every cutlet gets an even coat. Keep the tray in the fridge while you fry in batches cold cutlets hold their shape much better in hot oil than room-temperature ones.
Garnish and Presentation
A thoughtful garnish turns a simple fried snack into something that looks genuinely impressive on the table. Lay a few thin rings of raw red onion on each serving plate, scatter a small pinch of chaat masala over them, and add a wedge of fresh lime. A sprig of coriander and two or three slit green chillies placed beside the cutlets add colour and signal the spice level visually. If you are serving at a party, a light dusting of red chilli powder over the white surface of a dipping bowl looks neat and intentional.
For a restaurant-style finish, drizzle a thin zigzag of tamarind chutney across the plate before placing the cutlets. The dark, glossy chutney against the golden crust is visually striking and it tastes even better than it looks.
Also Read: Chicken Cutlet Recipe
Plating and Serving Tips
Serve fish cutlets hot within 5 minutes of coming out of the pan is ideal. Arrange them in a slight overlap or stacked at an angle on a flat plate or wooden serving board. Place two small bowls on the side one with green chutney, one with tamarind chutney and tuck the onion salad between the cutlets and the dipping bowls for a complete, balanced plate.
If you are serving a crowd, keep cooked cutlets warm on a wire rack placed over a baking tray in an oven set to 100°C (210°F). The rack allows air to circulate underneath so the bottom does not go soggy while you finish frying the remaining batches. Never stack cooked cutlets on top of each other while hot the steam makes the crusts soft very quickly.
If you try this recipe, I would love to hear how it went! Leave a star rating below and drop a comment sharing which fish you used or any tweaks you made. Your feedback truly helps other readers, and it genuinely makes my day to hear from you. Save this to Pinterest so you can find it again next time the craving strikes!
Ingredients
- 500g (1.1 lb) firm fish fillets
- 2 tablespoons fresh coriander (cilantro) leaves, finely chopped
- 1 medium onion, finely chopped
- kingfish, tilapia, basa, salmon, or catfish (or 2 x 185g cans of tuna in water, drained thoroughly as a shortcut)
- 2 medium potatoes, boiled, peeled, and mashed (approx. 1 cup mashed)
- 1 tablespoon ginger-garlic paste (or 1 tsp each fresh grated ginger and garlic)
- 2 green chillies, finely chopped (adjust to taste)
- 8–10 fresh curry leaves, finely chopped
- 1 teaspoon red chilli powder
- 1 tablespoon oil (for the sauté base)
- ½ teaspoon black pepper powder
- ½ teaspoon garam masala
- 1 teaspoon coriander powder
- ¼ teaspoon turmeric powder
- 1 teaspoon salt (adjust to taste)
- 1 tablespoon fresh lemon juice
Nutritional Information
- Calories Dietary: 285 kcal
- Sugar: 2g
- Sodium: 430mg
- Protein: 24g
- Carbohydrates: 21g
- Fat: 11g
- Fiber: 2g
Directions
1. POACH THE FISH
Place the fish fillets in a shallow pan. Add ½ cup water, ¼ teaspoon turmeric,
and ½ teaspoon salt. Bring to a gentle simmer over medium-low heat, cover,
and cook for 6 to 8 minutes until the fish is fully opaque and flakes easily
when pressed with a fork. Drain the water completely, remove any bones, and
flake the fish into small, even pieces using a fork. Return the flaked fish
to the pan over low heat for 1 to 2 minutes, stirring, until all remaining
moisture evaporates and the fish looks dry and slightly crumbly. Set aside to cool.
2. BOIL AND DRY THE POTATOES
Place the potatoes in a pot, cover with cold water, and bring to a boil.
Cook for 12 to 15 minutes until completely tender when pierced with a fork.
Drain, peel, and mash until smooth with no lumps. Spread the mash on a flat
plate and leave for 10 minutes to release steam. The mash must be cool and
dry before you add it to the fish mixture.
3. BUILD THE SPICE BASE
Heat 1 tablespoon of oil in a pan over medium heat. Add the finely chopped onions
and curry leaves. Sauté for 4 to 5 minutes until the onions are soft and lightly
golden. Add the ginger-garlic paste and green chillies and cook for 1 minute,
stirring constantly, until the raw smell disappears.
4. ADD SPICES AND FISH
Add the red chilli powder, coriander powder, black pepper, and turmeric to the pan.
Stir for 30 seconds on low heat. Add the cooled, flaked fish and fold everything
together gently — you want to combine without breaking the fish down too much.
Cook on low heat for 2 minutes. Remove from heat. Stir in the chopped coriander
leaves, lemon juice, and garam masala. Taste and adjust salt at this point.
5. COOL THE MIXTURE
Transfer the fish mixture to a large bowl and let it cool completely to room
temperature — about 15 minutes. Do not rush this step. Shaping warm filling
leads to soft, sticky cutlets that break apart in the pan.
6. COMBINE WITH MASHED POTATO
Once the fish mixture is fully cooled, add the dry mashed potato to the bowl.
Mix well with clean hands or a large spoon until everything is evenly combined.
The mixture should feel firm enough to roll into a ball without sticking
excessively to your palms. If it feels wet or sticky, add 1 tablespoon of
breadcrumbs and mix again.
7. SHAPE THE CUTLETS
Lightly oil your palms. Take a heaped tablespoon and a half of the mixture
(roughly the size of a small lime), roll it into a smooth ball, then press
and flatten gently into a round or oval patty about 1.5 cm (½ inch) thick.
Place on a parchment-lined tray. Repeat with the remaining mixture — you
should get 10 to 12 cutlets. Try to keep them roughly the same thickness
so they cook evenly.
8. COAT THE CUTLETS
Set up your coating station: one plate with flour or cornstarch, one shallow
bowl with beaten egg (with a pinch of salt), one plate with breadcrumbs.
Working one at a time: dust each cutlet lightly in flour, dip in beaten egg,
then press firmly into the breadcrumbs on both sides and around the edges.
For extra crunch, dip in egg and breadcrumbs a second time. Return each
coated cutlet to the tray as you go.
9. CHILL (RECOMMENDED)
Place the tray of coated cutlets in the refrigerator for 20 to 30 minutes.
This firms them up and ensures the breadcrumb coating bonds well so it does
not fall off during frying. While the cutlets chill, prepare your serving
plates and dipping chutneys.
10. FRY THE CUTLETS
Heat 3 to 4 tablespoons of oil in a heavy-bottomed pan over medium heat.
Test the heat by dropping in a small breadcrumb — it should sizzle immediately
and steadily. Add 3 to 4 cutlets to the pan. Do not crowd the pan.
Fry without disturbing for 3 to 4 minutes until the underside is deep golden
brown. Flip carefully using a flat spatula and fry the other side for another
3 to 4 minutes until evenly golden. The crust should look deep amber-gold,
not pale yellow. Fry in batches, adding fresh oil to the pan between batches.
11. DRAIN AND SERVE
Remove the cutlets from the pan and drain on a plate lined with kitchen paper
towels for 1 to 2 minutes. Arrange on a serving plate with sliced onion rings,
lemon wedges, green chutney, and tamarind chutney on the side. Serve immediately
while the crust is at its crispiest.
Rate this Recipe
User Reviews
No reviews yet. Be the first to share your thoughts!