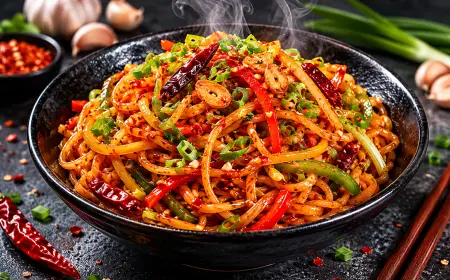
Homemade Kimchi: Korea's Most Beloved Fermented Food
Kimchi recipe with authentic salting, homemade yangnyeom paste & fermentation guide. Vegan option included. Probiotic-rich, ready in 2 hours.
 Tripti Srivastava
There is something genuinely special about opening a jar of kimchi that you made yourself for the first time the faint hiss of live fermentation, the vivid crimson of the gochugaru paste between the leaves, the smell that is simultaneously sharp, garlicky, and faintly sour in a way that is completely unlike anything else in a home kitchen. Kimchi is one of the world's great fermented foods, and making it from scratch is one of those cooking projects that rewards you with something that just gets better over time. The flavour on day one is bright and spicy. On day seven it is tangy and complex. On day thirty it has a depth and sourness that most store-bought kimchi never quite reaches. And every day between those, it is different, alive, and developing in your refrigerator while you go about your week.
Kimchi is more than just food it is a symbol of community, tradition, and national identity in Korea. The annual tradition of kimjang, where families and communities gather to make large quantities of kimchi to last through the winter, was recognised by UNESCO as an Intangible Cultural Heritage of Humanity in 2013. It was not until the 16th century, following the introduction of chili peppers from the Americas via Japan, that kimchi took on its characteristic red colour and spicy heat transforming what had been a centuries-old tradition of salted, fermented vegetables into the vivid, pungent, deeply flavoured dish the world now knows. Today, research published in the Journal of Microbiology and Biotechnology has identified over 200 species of microorganisms involved in kimchi fermentation at various stages making kimchi not just a dish but a living ecosystem in a jar.
This recipe gives you the complete starter guide: the salting technique that draws moisture from the cabbage while seasoning it from the inside, the yangnyeom paste built from scratch, the vegan substitution system for a fully plant-based version, the fermentation timeline and visual cues for knowing when your kimchi is ready, storage guidance for keeping it well for months, and a full presentation guide for serving kimchi as a starter, side dish, or condiment. By the end of this recipe, you will understand kimchi well enough to make it confidently, adjust it to your taste, and keep making it for as long as you want which, once you have made your first batch, will be a very long time.
What Makes This Kimchi Starter Recipe Special
There is no shortage of kimchi recipes available, but many either oversimplify the process (omitting steps that genuinely matter) or present the dish as so technically demanding that first-time makers are discouraged before they begin. This recipe sits deliberately in the middle it is authentic in technique and ingredient philosophy, but approachable for anyone making kimchi for the first time.
- The salting technique is explained from first principles. Salting the cabbage is not just a seasoning step it is the critical preparatory process that draws water out of the cabbage cells through osmosis, softens the leaves so they can flex and roll without breaking, creates the initial environment that favours the lactic acid bacteria (LAB) responsible for fermentation, and seasons the cabbage from the inside rather than just on the surface. Korean coarse sea salt is the best for salting vegetables to make kimchi it is natural salt with a coarse texture that is minimally processed and tastes good without bitterness, helping to develop flavours in fermented foods. This recipe explains when the cabbage is correctly salted and what it should look and feel like so you are not guessing.
- The yangnyeom paste is made from scratch with the full ingredient list. The yangnyeom is the flavour soul of kimchi the paste of gochugaru (Korean red pepper flakes), fish sauce (or vegan substitute), garlic, ginger, and fermented shrimp (or vegan substitute) that gets pressed between every leaf and transforms salted cabbage into kimchi. While fish sauce and fermented shrimp paste are essential for achieving authentic Korean kimchi flavour, you can make a vegetarian or vegan version by substituting with vegan fish sauce or a strong mushroom broth. Both the traditional and vegan versions are covered in full.
- The fermentation science is explained without jargon. Understanding what is happening in the jar helps you trust the process rather than worry about it. During fermentation, beneficial lactic acid bacteria naturally present on vegetables convert sugars into lactic acid, which acts as a preservative and gives kimchi its distinctive sour taste. Two dominant bacterial strains Lactobacillus plantarum and Leuconostoc mesenteroides play a vital role in flavour development and are known to support gut health and immune function through their probiotic effects.
- Clear timelines and visual cues not vague instructions. "Ferment until ready" is not useful guidance. This recipe gives you specific timelines, temperature guidance, and the visual and sensory cues the faint effervescence, the tanginess developing in the taste, the colour deepening that tell you exactly where your kimchi is in the fermentation process and what to do next.
- The health benefits are addressed honestly. Kimchi is rich in probiotics which aid in digestion and promote gut health, thanks to the fermentation process. It is also a great source of vitamins A, B, and C, as well as antioxidants which can help boost immunity. These benefits are real and research-supported and this recipe addresses them clearly without making unsubstantiated health claims.
Ingredients Overview
Napa cabbage (baechu in Korean, also called Chinese cabbage) is the foundation of this recipe. It is a large, pale green, oblong cabbage with tender, crinkled leaves and thick white stems. It is widely available at Asian grocery stores and increasingly in larger supermarkets. One medium head weighing approximately 1 to 1.2 kg is the right size for a starter batch that fills one large jar. Look for a head that feels heavy for its size with tightly packed, fresh-smelling leaves. Quarter the cabbage lengthwise or cut it into sections for easier handling and salt it between the leaves, not just on the outside.
Gochugaru is Korean red pepper flakes not to be confused with regular red chilli flakes or gochujang (the fermented chilli paste). Gochugaru has a specific flavour profile: fruity, moderately hot, and slightly smoky, with a coarse, slightly oily texture that is essential to the character of kimchi. There is genuinely no substitute that produces the same colour or flavour if you want to make authentic kimchi, sourcing gochugaru is worth the effort. It is available at any Korean or Asian grocery store and online. The standard recipe uses 3 to 4 tablespoons per medium head of cabbage adjust down for a milder kimchi, never substitute with regular chilli flakes.
Garlic and ginger are used in quantities that seem large relative to a Western seasoning context a full head of garlic and a generous thumb of ginger for a single jar of kimchi. These amounts are correct. Korean kimchi is boldly seasoned and the garlic and ginger quantities used are traditional and essential to the depth of the finished flavour. Both should be freshly grated or minced not from a jar, not powdered.
The umami layer in traditional kimchi comes from fish sauce and fermented shrimp paste (saeujeot). Fish sauce adds a deep, savoury, fermented character that is hard to replicate. Fermented shrimp paste adds an even more intense umami depth. For a fully vegan version, replace the fish sauce with equal quantities of soy sauce or a good quality vegan fish sauce, and replace the fermented shrimp with a tablespoon of doenjang (Korean fermented soybean paste) or an additional tablespoon of soy sauce. Many vegan kimchi recipes use kelp broth or mushroom powder to replicate the savoury depth a teaspoon of dried shiitake mushroom powder stirred into the paste adds excellent umami without any animal products.
The sweet rice flour paste (pul) is cooked briefly with water to create a thick, sticky porridge that helps the seasoning paste adhere to the cabbage leaves and provides carbohydrates that feed the lactic acid bacteria during early fermentation. It is an important functional ingredient, not just a filler. Sweet rice flour (glutinous rice flour or chapssal-garu) is available at Korean grocery stores. If unavailable, regular rice flour works as a substitute.
How to Make It
The process has four distinct stages. Stage one: quarter the cabbage, salt it generously between every leaf, and leave it for 1 to 2 hours to draw out moisture and soften. Stage two: rinse the salted cabbage thoroughly, squeeze out excess moisture, and taste it should be salty but not overwhelmingly so. Stage three: make the yangnyeom paste, taste it, adjust it, and apply it between every leaf of every cabbage section. Stage four: pack tightly into an airtight glass jar, press down firmly to remove air pockets, and ferment at room temperature for 1 to 2 days before refrigerating. Active hands-on time is about 45 minutes. Most of the total time is the passive salting period.
The fermentation that follows over the subsequent days and weeks is not something you do it is something the kimchi does. Your role is to press it down gently once a day for the first few days to keep the cabbage submerged under its own brine, and to taste it periodically to track the flavour development. When it reaches the level of tanginess and depth that you enjoy, move it to a colder spot in the refrigerator to slow the fermentation. The full directions are below.
Also Read: Chicken Karage Recipe
Tips for Best Results
- Use Korean coarse sea salt not table salt or fine salt. Table salt is significantly saltier by volume than coarse sea salt and will produce over-salted kimchi that cannot be fixed after the fact. If you can only find fine salt, use approximately 25% less than the recipe calls for. Coarse sea salt also has a natural mineral content that contributes to the flavour complexity of fermented food in a way that refined table salt does not.
- Salt every layer not just the outside. Open each leaf of the cabbage quarters and distribute the salt between every layer so it contacts the inner surfaces directly. Salting only the outside of the cabbage produces uneven softening and uneven seasoning the outer leaves become over-salted and the inner leaves remain underworked and stiff.
- Taste the cabbage after rinsing. After rinsing the salted cabbage, taste a small piece. It should taste pleasantly salty like a well-seasoned salad. If it tastes excessively salty, rinse again under cold water. If it tastes barely salty, it is fine the yangnyeom paste will add further seasoning. Getting this right is the most important judgement call in the entire process.
- Wear gloves when applying the paste. Gochugaru stains skin and nails a deep orange-red that takes days to fade. Disposable kitchen gloves are essential for applying the yangnyeom paste to the cabbage. They also make the process more comfortable you can work quickly and firmly without worrying about the capsaicin from the chilli irritating your skin.
- Pack the jar tightly and press down firmly. Air pockets in the kimchi jar create spaces where harmful bacteria can develop rather than the beneficial lactic acid bacteria you are cultivating. Pack the kimchi tightly, pressing down firmly after each handful goes into the jar. The cabbage should be fully submerged under its own brine by the time the jar is full.
- Leave headspace in the jar. The fermentation process produces carbon dioxide gas which expands the contents of the jar. Always leave at least 2 to 3 cm of headspace at the top of the jar to prevent overflow. Place the jar on a plate during the room-temperature fermentation period as insurance against overflow from an active fermentation.
Serving Suggestions
Kimchi is one of the most versatile fermented foods in any culinary tradition. As a side dish banchan in Korean it is served in a small bowl alongside a bowl of steamed short-grain rice at almost every Korean meal. The kimchi provides the sharp, complex counterpoint to the gentle, clean flavour of the rice and makes the combination into something genuinely complete. Eat with rice. Eat it with eggs. Eat it with steak and mashed potatoes. Make Kimchi Fried Rice, Kimchi Stew, Kimchi Pancakes. It gives everything it touches an umami kick that is both distinctive and addictive.
As a starter or appetiser, serve a small portion of kimchi in a shallow ceramic bowl with a pair of chopsticks alongside steamed edamame and a small dish of pickled cucumber for a Korean-style sharing spread. For a more substantial starter, use kimchi as a topping on a warm Korean pancake (kimchi jeon) or serve alongside bibimbap as part of a full Korean meal at home.
Storage and Fermentation Guide
Room temperature fermentation (1–2 days): After packing into the jar, leave at room temperature (18°C to 22°C is ideal) for 1 to 2 days. During this period, the lactic acid bacteria are most active you may see tiny bubbles forming in the brine and the kimchi will smell increasingly tangy and pungent. Press the cabbage down once daily to keep it submerged. After 1 to 2 days, taste it if it is pleasantly tangy and has developed a faint sourness, it is ready to move to the refrigerator. If you prefer it fresher and less sour, refrigerate after 24 hours.
Refrigerator fermentation (1 week to 3 months): After packing, let the kimchi ferment at room temperature for 1 to 2 days, then transfer to the refrigerator. It will keep for up to 3 months, developing deeper flavour over time. Keep the jar sealed and ensure the cabbage stays submerged in its juice. Fresh kimchi (geotjeori) eaten within the first week is bright, spicy, and crunchy. Aged kimchi (mugeun kimchi) eaten after 2 to 4 weeks is sour, deeply complex, and particularly good for cooking with rather than eating raw.
Variations and Substitutions
- Vegan Kimchi (Chaesik Kimchi): Replace the fish sauce with soy sauce or tamari in equal quantity. Replace the fermented shrimp paste with a tablespoon of doenjang (Korean fermented soybean paste) or an extra tablespoon of soy sauce plus a teaspoon of dried shiitake mushroom powder for umami depth. Replace the sweet rice flour paste with regular rice flour paste the process and fermentation timeline are identical. The result is a fully plant-based kimchi that ferments and tastes very similar to the traditional version, though without the same depth of oceanic umami that fish sauce and fermented shrimp provide.
- Kkakdugi (Radish Kimchi): Replace the napa cabbage with one large Korean radish (mu), cut into 2.5 cm cubes. Salt the cubes for 30 minutes only (radish releases moisture faster than cabbage). Apply the same yangnyeom paste and ferment in the same way. Kkakdugi is crunchier and slightly more peppery than cabbage kimchi and pairs particularly well with soups and stews.
- Oi Sobagi (Cucumber Kimchi): Score whole small cucumbers deeply in a crosshatch pattern without cutting all the way through. Salt the cucumbers for 30 minutes. Stuff the cuts with a slightly drier version of the yangnyeom paste mixed with matchstick-cut radish and spring onion. Eat within 3 to 5 days cucumber kimchi does not keep as long as cabbage kimchi but is refreshing, crunchy, and ideal as a summer side dish.
- Geotjeori (Fresh Unfermented Kimchi): Apply the yangnyeom paste to the rinsed, salted cabbage exactly as above but serve immediately rather than leaving to ferment. Geotjeori is eaten fresh it has the spice and garlic of kimchi without the sourness of fermentation. It is lighter, crunchier, and less pungent than aged kimchi. Add a tablespoon of rice vinegar and a teaspoon of sugar to the paste to compensate for the sourness that fermentation would otherwise develop.
- Mild Kimchi (for Heat-Sensitive Eaters): Reduce the gochugaru to 1 tablespoon and replace the remaining volume with a tablespoon of gochujang and a tablespoon of sweet paprika. The paprika provides the deep red colour without the heat, and the gochujang adds flavour complexity. The result is a noticeably milder kimchi that retains the character of the traditional version while being accessible to those who cannot handle significant spice.
Preparation Method
Quarter the napa cabbage lengthwise, then cut each quarter crosswise into 5 to 6 cm sections if making a cut kimchi (mak kimchi, which is easier to eat as a starter and easier to make for beginners). Gently open the leaves of each section and sprinkle coarse sea salt between every layer, paying extra attention to the thick white stem sections which take longer to soften. Place in a large bowl, toss briefly, and leave for 1 to 2 hours, tossing every 30 minutes. The cabbage is ready when the leaves are pliable and have released significant liquid they should bend without snapping.
Rinse the salted cabbage under cold running water two to three times, squeezing each handful firmly to remove excess moisture and salt. Taste and adjust. While the cabbage drains in a colander, make the sweet rice flour paste: whisk 2 tablespoons of sweet rice flour with half a cup of water in a small saucepan over medium heat, stirring constantly until it thickens to a smooth, translucent porridge about 5 minutes. Cool completely. Combine the cooled paste with gochugaru, garlic, ginger, fish sauce or soy sauce, fermented shrimp or doenjang, sugar, and spring onion into the yangnyeom paste. Wearing gloves, work the paste between every leaf of every cabbage section. Pack tightly into a clean glass jar, pressing firmly to eliminate air pockets. Leave 2 to 3 cm of headspace. Seal and ferment as directed.
Standard Operating Procedure (SOP)
For consistent, reliably fermented kimchi every single time, follow this sequence: quarter and section cabbage → salt between every leaf of every section, extra attention to white stems → rest 1–2 hours, turning every 30 minutes → check pliability (leaves should bend without snapping) → rinse 2–3 times under cold water → squeeze firmly → taste (pleasantly salty) → drain in colander 20 minutes → make sweet rice flour paste and cool completely → combine paste with gochugaru, garlic, ginger, fish sauce or soy sauce, fermented shrimp or doenjang, sugar, spring onion → taste yangnyeom and adjust → wear gloves → work paste between every leaf of every section → pack tightly into sterilised glass jar → press firmly to remove all air pockets → leave 2–3 cm headspace → place jar on a plate → ferment at room temperature 1–2 days → press down daily to keep cabbage submerged → taste after 24 hours and 48 hours → refrigerate when at desired tanginess → continue tasting weekly as flavour develops. The four steps that most directly affect the quality are the thoroughness of the salting (even seasoning and softening), the quality of the gochugaru (flavour foundation), the firmness of the jar packing (successful fermentation environment), and the patience of the fermentation (depth of flavour over time).
For making kimchi in larger quantities the kimjang approach the same technique scales directly. Double or triple the ingredients, use a large basin for salting, and ferment in multiple jars. Kimjang-style kimchi made in autumn and kept refrigerated through winter develops a depth and complexity that a small batch made in summer rarely matches the cooler temperature slows fermentation to a pace that allows the most complex flavour development. Making a large batch once and eating it over three to four months is far more rewarding than making small batches repeatedly.
Garnish and Presentation
Kimchi as a starter or side dish is presented simply and intentionally the vivid crimson of the gochugaru coating, the pale white of the cabbage visible beneath it, and the green of the spring onion throughout the kimchi are already visually beautiful without any additional garnish. Serve in a small, shallow ceramic bowl ideally a traditional Korean earthenware bowl (onggi) if you have one, or a deep white porcelain bowl that shows the colour of the kimchi clearly. Use chopsticks or a small pair of tongs to arrange the kimchi loosely in the bowl with some height and layering visible not pressed flat.
For a starter presentation, garnish with a small sprinkle of toasted sesame seeds over the top, a few drops of toasted sesame oil, and a thin slice or two of fresh red chilli for colour. A small pile of thinly sliced spring onion greens scattered over the top adds freshness and visual contrast against the red kimchi. For a dinner party starter board, arrange a small bowl of kimchi alongside a bowl of steamed edamame, a dish of pickled daikon, a small bowl of gochujang dipping sauce, and a plate of warm Korean pancakes this Korean banchan spread is one of the most visually striking and culturally interesting starter presentations you can put on a table.
Plating and Serving Tips
Always taste kimchi from the jar before plating and adjust the serving temperature kimchi is best served at cool room temperature, not cold from the refrigerator. If it has been stored in a very cold part of the fridge, let it sit for 5 to 10 minutes at room temperature before serving so the aromas are fully present when it reaches the guest. Cold kimchi tastes flatter and less aromatic than kimchi at cool room temperature.
For a formal starter course, serve a small, precisely arranged portion about 60 to 80g per person in a small, dark ceramic bowl. The contrast of the vivid red kimchi against a dark bowl is immediately striking. Two or three chopsticks placed alongside the bowl rather than a spoon signals the Korean context of the dish. For a family-style shared meal, place the kimchi jar itself at the table with a pair of serving tongs or chopsticks for guests to serve themselves this is how kimchi is served in Korean homes and the communal, participatory element of it is part of the experience.
If you make this kimchi, I genuinely want to hear how your first batch turned out how long you fermented it, whether you went traditional or vegan, what the flavour was like on day one versus day seven, what you used it for first. Leave a star rating below and drop a comment. Your notes help other first-time kimchi makers approach the fermentation with confidence rather than anxiety, and I read every single one. Save this to Pinterest now so it is always there for your next weekend project, your first kimjang session, or the next time you want to make something genuinely alive and extraordinary in your kitchen!
Ingredients
- 1 medium napa cabbage (baechu)
- ½ cup (120g) Korean coarse sea salt (cheonilyeom)
- Cold water for soaking
- 3 to 4 tablespoons gochugaru (Korean red pepper flakes coarse)
- 1 full head of garlic (10–12 cloves), finely grated or minced
- 1 tablespoon fresh ginger, finely grated
- 1 small Korean radish (mu) or daikon, peeled and cut into thin matchsticks
- 4 spring onions, cut into 3 cm batons (included in the paste)
- 1 teaspoon white sugar (or Asian pear/apple puree 2 tbsp for natural sweetness)
- 1 tablespoon fermented salted shrimp (saeujeot)
- 2 tablespoons fish sauce (saengseom-aek-jeot)
- ½ cup (120ml) water
- 2 tablespoons sweet rice flour (chapssal-garu / glutinous rice flour)
Nutritional Information
- Calories: 15–25 kcal
- Protein: 1g
- Carbohydrates: 3g
- Fat: 0.3g
- Fiber: 1.5g
- Sodium: 280mg
- Sugar: 1g
Directions
1. PREPARE AND SALT THE CABBAGE
Quarter the napa cabbage lengthwise by making a shallow cut at the base and
gently pulling the halves apart with your hands rather than cutting all the way
through — this preserves more of the leaf structure. Cut each quarter crosswise
into 5 to 6 cm sections (mak kimchi style — easier for beginners and for serving
as a starter or side dish).
Place the cabbage sections in a large bowl. Working section by section, gently
open the leaves and sprinkle coarse sea salt directly between every leaf layer —
pay particular attention to the thick white stem sections, which need more salt
and take longer to soften than the leafy parts. Use the full ½ cup of salt
distributed throughout the entire head of cabbage.
Leave the salted cabbage to rest at room temperature for 1 to 2 hours,
turning and redistributing every 30 minutes. The cabbage is ready when:
→ The leaves bend and flex without snapping when gently folded
→ Significant liquid (brine) has collected at the bottom of the bowl
→ The volume of the cabbage has reduced by roughly one-third
→ The thick stems feel noticeably softer to the touch
2. MAKE THE SWEET RICE FLOUR PASTE
While the cabbage is salting, make the pul. Whisk 2 tablespoons of sweet rice
flour into ½ cup of cold water in a small saucepan until no lumps remain.
Place over medium heat and stir constantly until the mixture thickens to a smooth,
translucent, porridge-like consistency — about 4 to 5 minutes. It should coat the
back of a spoon and hold its shape briefly when dropped. Remove from heat and
set aside to cool completely to room temperature before using. A warm paste will
cook the gochugaru slightly and dull its colour and flavour.
3. RINSE AND DRY THE CABBAGE
Once the cabbage has fully softened, rinse it under cold running water two to three
times — tasting a piece between each rinse. After rinsing, squeeze each handful of
cabbage sections firmly between your hands to extract as much water as possible.
The cabbage should feel dense and compact after squeezing, not waterlogged.
Place the squeezed cabbage sections in a large colander and leave to drain for
15 to 20 minutes. Taste again — it should taste pleasantly salty, like a well-seasoned
salad. If still too salty, rinse one more time and squeeze again.
4. BUILD THE YANGNYEOM PASTE
In the large bowl (wiped clean and dry), combine the cooled sweet rice flour paste
with the gochugaru. Stir until completely combined and the paste is a uniform,
vivid red-orange colour. Add the minced garlic, grated ginger, fish sauce (or soy
sauce for vegan), fermented shrimp (or doenjang and shiitake powder for vegan),
and sugar. Mix thoroughly until the paste is smooth, fragrant, and well combined.
Taste the yangnyeom paste — this is the most important tasting moment in the recipe.
It should be bold, spicy, garlicky, and faintly sweet and savoury all at once.
Adjust: more gochugaru for heat, more sugar for sweetness, more fish sauce or
soy sauce for saltiness and depth. The paste will taste more intense at this stage
than in the finished kimchi — the cabbage will absorb and balance the flavours.
Add the spring onion batons and radish matchsticks to the paste and toss to coat.
5. APPLY THE PASTE TO THE CABBAGE
Put on your gloves — this is non-negotiable. The gochugaru will stain your hands
deeply and the garlic and chilli can irritate your skin during prolonged contact.
Add the drained cabbage sections to the paste bowl in small batches. Working with
each section individually, use your gloved hands to work the paste firmly between
every leaf, pressing and massaging so that every surface — including the inner
leaves and the cut surfaces — is thoroughly coated in the vivid red yangnyeom.
Take your time here. Even, thorough coating is what produces consistently flavoured
kimchi throughout the entire jar. Set each coated section aside as you go.
6. PACK THE JAR
Use a large, clean glass jar (1 to 1.5 litre capacity) that has been sterilised
by washing in hot soapy water, rinsing thoroughly, and drying completely.
Pack the coated kimchi into the jar in tight, compact layers. After each layer,
press down firmly with your gloved fist or the back of a clean spoon to eliminate
air pockets and compact the contents. The kimchi will release more of its own brine
as you press — this is correct. By the time the jar is full, the cabbage should
be submerged (or close to submerged) under a reddish brine.
Leave 2 to 3 cm of headspace at the top of the jar — the fermentation process
produces carbon dioxide gas that expands the contents.
Seal the jar with its airtight lid.
7. ROOM TEMPERATURE FERMENTATION
Place the sealed jar on a small plate (as insurance against overflow) and leave
at room temperature — ideally 18°C to 22°C. Avoid placing in direct sunlight
or in a very warm spot (above 25°C), which accelerates fermentation too quickly.
Avoid placing in a very cold spot, which slows or stops fermentation.
Once a day, open the jar and press the kimchi down firmly with a clean spoon
to keep it submerged under its brine. If the brine does not cover the kimchi,
mix ½ teaspoon of coarse sea salt with ½ cup of water and pour over the top.
After 24 hours: open, smell, taste. The kimchi should smell pungently garlicky
and faintly sour. The taste will be spicy, slightly tangy, and beginning to develop
its characteristic fermented character.
After 48 hours: smell, taste again. The sourness should be more pronounced,
the flavour deeper. Small bubbles may be visible in the brine — these are CO2
produced by the lactic acid bacteria and are a sign of healthy fermentation.
8. REFRIGERATE AND CONTINUE FERMENTING SLOWLY
Once the kimchi has reached a level of tanginess you enjoy (most people prefer
to refrigerate after 1 to 2 days at room temperature), transfer the jar to the
refrigerator. The cold temperature dramatically slows the fermentation without
stopping it entirely. The kimchi will continue to develop flavour — slowly and
beautifully — over the following weeks. Taste it weekly. The transformation from
week one to week four is remarkable.
→ WEEK 1: Bright, spicy, crunchy, faintly tangy. Best for eating fresh.
→ WEEK 2–3: Deeper sourness, more complex, the garlic and ginger round out.
→ WEEK 4+: Genuinely sour, profoundly complex. Best for cooking with —
kimchi fried rice, kimchi jjigae (stew), kimchi jeon (pancakes).
Keep the jar sealed between uses and press the kimchi down after each serving
to keep it submerged. Kimchi keeps well in the refrigerator for up to 3 months.
Rate this Recipe
User Reviews
No reviews yet. Be the first to share your thoughts!