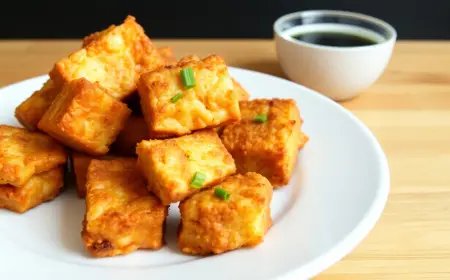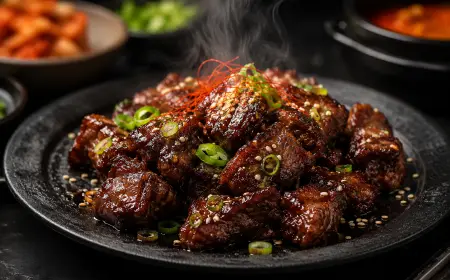
Shrimp Karaage: Crispy Japanese Fried Shrimp That Disappears Off Plate
Shrimp karaage with sake marinade, potato starch coating & double-fry technique. Juicy inside, shatter-crispy Japanese fried shrimp ready in 30 mins.
 Tripti Srivastava
There is a specific kind of crispiness that shrimp karaage produces that is unlike any other fried seafood preparation a thin, shattering coating that breaks apart at the first bite to reveal a plump, juicy shrimp that has been seasoned from the inside by its marinade. No thick batter. No heavy breading. No flour-and-egg coating that drowns the ingredient underneath it. Just the shrimp itself, briefly marinated, dusted in potato starch, and fried in hot oil until the surface turns a deep, golden, almost lacquered finish that makes the plate empty much faster than anyone planned. Whether you are making this for a Japanese-style dinner at home, an izakaya-inspired party spread, or simply because crispy, perfectly seasoned fried shrimp is one of the great pleasures of eating this recipe gets you there in 30 minutes.
Karaage is a Japanese cooking technique in which small pieces of meat or fish are marinated, dredged with a starch, and deep fried in oil. The marinade typically includes sake, soy sauce, ginger juice, and scallions. The process is different from other Japanese frying techniques unlike tempura, which uses a batter, karaage uses a simple starch coating. This method creates a crispy, thin outer layer while keeping the inside juicy and flavourful. Applied to shrimp, this technique produces something genuinely special. Shrimp karaage stands out with its unique flavour profile it incorporates bolder spices such as garlic powder and allspice, which complement the natural sweetness of the shrimp beautifully. Allspice is not a spice you might immediately associate with Japanese cooking, but in the context of shrimp karaage it works with remarkable elegance the warm, slightly floral notes of allspice bring out the sweetness of the shrimp in a way that straightforward soy and ginger cannot achieve alone.
This recipe gives you the complete picture: the sake moisture-drawing technique that removes the surface liquid from the shrimp before marinating (the step that makes the coating stick and the marinade absorb properly), the potato starch coating science, the double-fry method for maximum crispiness, the dipping sauce options, the air fryer adaptation, and a full SOP and presentation guide. Make it once and you will make it again within the week.
What Makes This Shrimp Karaage Recipe Special
Shrimp karaage is not a difficult dish, but there are a few specific choices that separate a genuinely excellent result from a merely good one. This recipe makes every one of them deliberately.
- Sake as the moisture-drawing first step. Sprinkling sake over the shrimp and letting it sit for ten minutes before patting dry removes excess moisture from the shrimp surface. This step serves three purposes at once. The alcohol in the sake begins to draw surface moisture out of the shrimp through osmosis. It neutralises any residual fishiness from the shrimp's natural proteins. And it adds a subtle, faintly sweet depth of flavour to the shrimp before the main marinade even goes on. It takes five minutes and makes a visible difference to both the texture of the coating and the flavour of the finished shrimp.
- Potato starch, not plain flour, as the coating. This is the central technical choice that defines karaage and separates it from other fried preparations. Potato starch has a very different structure from wheat flour it has almost no gluten and a higher starch density, which means it fries to a thin, extremely crispy, almost translucent shell rather than a thick, flour-tasting crust. The coating on a well-made karaage looks almost lacquered deeply golden, very thin, and with a texture that crunches through cleanly rather than requiring effort. Cornflour (cornstarch) is the most accessible substitute, but potato starch produces a lighter, crispier result.
- The double-fry method for the deepest crunch. Frying the shrimp once at a lower temperature (165°C) cooks them through gently without drying them out. A second quick fry at a higher temperature (185°C) for 30 to 45 seconds immediately before serving drives the remaining moisture out of the coating and produces the deeply golden, lacquered exterior that is the visual and textural signature of great karaage. The shrimp go in from the first fry plump and juicy. They come out of the second fry golden, crackling, and exactly as good as anything you have eaten at a Japanese restaurant.
- Allspice in the seasoning blend. This is the ingredient that most distinguishes shrimp karaage from the standard chicken version. The warm, slightly clove-and-cinnamon character of allspice pairs with the natural sweetness of shrimp in a way that is difficult to articulate but immediately noticeable in the eating. It is a bold, confident seasoning choice for a Japanese recipe and it works perfectly.
- The tail as the handle. Leaving the tails on the shrimp when frying is both practical and visually intentional. The tail serves as a natural handle for picking up and eating the shrimp without chopsticks, makes each piece look more generous and dramatic on the plate, and the tip of the tail fries to a crispy, edible golden piece that many people consider the best bite on the whole shrimp.
Ingredients Overview
Start with large or jumbo shrimp shell-off, deveined, with tails left on. The larger the shrimp, the more visually impressive the final plate and the more satisfying each bite. Tiger prawns, king prawns, or large Pacific shrimp all work beautifully. For more budget-friendly cooking, medium shrimp work fine the technique is identical and the result is equally good, just at a smaller scale. If using frozen shrimp, thaw overnight in the refrigerator, drain well, and pat extremely dry with kitchen paper before the sake step frozen shrimp hold significantly more surface moisture than fresh and need extra drying time.
The marinade is built from five elements, each with a specific function. Soy sauce provides the savoury, umami backbone and a small amount of the salt. Mirin (sweet Japanese rice wine) adds a natural, clean sweetness and helps the coating caramelise to a golden colour during frying. Sake both in the initial moisture-drawing step and in the marinade itself adds depth, removes fishiness, and begins flavouring the shrimp before the potato starch goes on. Fresh ginger, finely grated or pressed, adds a clean heat and brightness that cuts through the richness of the fried coating. Garlic powder not fresh garlic, which can burn on the shrimp surface during frying adds the rounded, slightly sweet garlic note. Allspice is the signature spice of this preparation and should be used with confidence. White pepper adds a clean, slightly floral heat that white pepper is specifically excellent at providing with seafood.
Potato starch (katakuriko in Japanese) is available at any Asian grocery store and increasingly in supermarkets. Cornflour (cornstarch) works as a direct substitute the texture will be fractionally less crispy but the result is still excellent. For a gluten-free version, use potato starch only the recipe as written is already wheat-free. For a slightly richer, crunchier coating, mix potato starch with a small amount of plain flour in a 3:1 ratio this is the ratio used in many restaurant karaage preparations.
How to Make It
The process runs in a clean, fast sequence: sprinkle sake over the shrimp and leave for 10 minutes, pat dry, mix the marinade and coat the shrimp, rest for 10 minutes, dust in potato starch, and double fry. Total active time is about 30 minutes, with two brief passive periods for the sake step and the marinade rest. The frying itself is fast large shrimp need only 60 to 90 seconds per fry at the correct temperature. The most important thing about frying shrimp karaage is not overcooking the shrimp they should be just barely cooked through at the end of the first fry, perfectly moist and sweet inside, with the second fry purely for crust development rather than additional cooking.
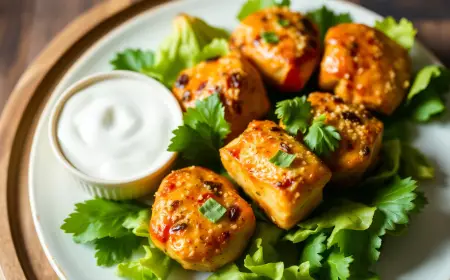
The dipping sauce takes two minutes to mix and elevates the finished plate from excellent to complete. The classic pairing is a small dish of Japanese kewpie mayonnaise with a wedge of lemon the creamy, slightly tangy mayo against the crispy, seasoned shrimp is one of the great simple food pairings. A small dish of ponzu sauce (citrus soy) is the cleaner, more traditional option for those who prefer something lighter alongside fried food.
Tips for Best Results
- Pat the shrimp thoroughly dry at every stage. After thawing (if frozen), after the sake step, and again after the marinade if any excess liquid has pooled. Surface moisture on the shrimp prevents the potato starch from forming a dry, even coat and produces a paste-like coating that fries unevenly rather than shattering cleanly. A dry shrimp surface is the foundation of the karaage coating.
- Do not marinate for too long. Unlike chicken karaage, which benefits from longer marination, shrimp are delicate and the soy sauce and sake in the marinade begin chemically denaturing the shrimp protein after about 20 to 30 minutes. Keep the marination time to 15 to 20 minutes maximum. The flavour penetrates very quickly because shrimp are much smaller and thinner than chicken.
- Shake off excess starch before frying. After dusting the shrimp in potato starch, shake each piece gently or tap the excess starch off. A thick, uneven starch coating produces a lumpy, doughy exterior rather than the thin, even, lacquered shell that is the visual signature of karaage. You want the thinnest even coat that covers the entire shrimp surface.
- Fry in small batches at the correct temperature. Each batch should have only 4 to 5 shrimp enough space for the oil to maintain its temperature around every piece simultaneously. Crowding the oil drops the temperature and produces pale, greasy shrimp rather than golden, crispy ones.
- Time the second fry to serve. The second fry is very short 30 to 45 seconds and should be timed so the shrimp go directly from the second fry to the plate. The lacquered crispiness produced by the second fry starts to fade within 3 to 4 minutes, so the timing should be: second fry → drain 15 seconds → plate → serve. Do not hold the second-fried shrimp in an oven or under a cover both create steam that softens the coating.
- Drain on a wire rack between fries. A wire rack allows air to circulate around every surface of the shrimp between the two fries, preventing steam from softening the partially cooked coating. Paper towels would achieve the opposite creating a steam surface that softens the base of the coating before the second fry.
Also Read: Thai Fish Skewers Recipe
Serving Suggestions
Shrimp karaage is served in the izakaya tradition as a drinking snack or starter a small plate of golden, perfectly seasoned fried shrimp with a dipping sauce and a cold beer or sake alongside. The classic izakaya accompaniment is a small mound of finely shredded cabbage dressed with a few drops of rice vinegar, a pinch of salt, and a drizzle of Japanese mayonnaise the cool, crunchy freshness of the cabbage against the hot, crispy shrimp is one of the most well-considered food pairings in Japanese casual dining. A wedge of fresh lemon and a small bowl of Japanese mayonnaise complete the plate.
For a fuller Japanese meal at home, serve shrimp karaage alongside steamed short-grain rice, a bowl of miso soup, and a simple cucumber and sesame salad for a complete, satisfying dinner that comes together in under 40 minutes. For a party, a large plate of shrimp karaage with two dipping sauces Japanese mayo and ponzu and a pile of shredded cabbage in the centre creates an effortlessly impressive shared starter that guests will finish before anything else on the table.
Storage and Reheating
Shrimp karaage is best eaten immediately within 3 to 4 minutes of the second fry, while the coating is at its crispiest and the shrimp are still hot and juicy inside. If you need to hold it briefly for a party, keep on a wire rack in a 100°C oven uncovered for up to 10 minutes. Never cover or stack hot karaage.
Storage: If you have leftovers, store in an airtight container in the refrigerator for up to 1 day. To reheat, place on a wire rack in an oven at 180°C for 6 to 8 minutes, or air fry at 180°C for 4 to 5 minutes. Avoid the microwave entirely it makes the coating soggy and the shrimp rubbery. Make-ahead for parties: Perform the first fry up to 1 hour in advance and keep on a wire rack at room temperature. Perform the second fry in batches as guests arrive it takes less than a minute per batch and produces a genuinely fresh, hot, crackling result at the table.
Variations and Substitutions
- Spicy Shrimp Karaage: Add half a teaspoon of shichimi togarashi (Japanese seven-spice blend) to the potato starch coating. Shichimi adds a warm, complex heat with notes of citrus peel, sesame, and chilli that complements the sweetness of the shrimp beautifully. Alternatively, add a teaspoon of gochugaru (Korean red pepper flakes) to the marinade for a bolder, fruitier heat.
- Honey Lemon Karaage Glaze: After the second fry, toss the shrimp briefly in a wok over high heat with a tablespoon of honey, a tablespoon of soy sauce, a squeeze of fresh lemon juice, and a few drops of sesame oil. The sauce caramelises around the coating in under 30 seconds and produces a sticky, glossy, sweet-sour glaze that is one of the most immediately pleasing variations on this recipe.
- Tatsutaage Style: Tatsutaage is a variation of karaage that uses a marinade of soy sauce, mirin, and sake with grated ginger. For the tatsutaage shrimp version, increase the soy sauce in the marinade to 2 tablespoons and replace the garlic powder and allspice with a tablespoon of grated fresh ginger. The coating turns a deep, rich red-brown colour from the soy-and-mirin marinade named after the Tatsuta River in Japan, whose autumn red maple leaves the colour resembles.
- Air Fryer Shrimp Karaage: After marinating and coating in potato starch, spray each shrimp generously with neutral oil and air fry at 200°C for 8 to 10 minutes, turning once at the halfway point. Spray with a little more oil before turning. The result is less dramatically golden than the double-fried version but still genuinely crispy and much lower in oil. Serve immediately after air frying.
- Shrimp and Vegetable Karaage: Fry sliced lotus root rounds, thick mushroom pieces, and small broccoli florets using the same potato starch coating (no marinade needed for vegetables just a light season of salt and white pepper before dusting). Serve on the same plate as the shrimp karaage for a mixed karaage platter that offers a full range of textures and flavours.
Preparation Method
Begin by cleaning the shrimp: peel the shells leaving the tails intact, devein by making a shallow cut along the back of each shrimp and removing the dark thread. Pat completely dry with kitchen paper. Sprinkle sake generously over the shrimp about a tablespoon for 500g toss gently to coat, and leave at room temperature for 10 minutes. After 10 minutes, pat the shrimp dry again with fresh kitchen paper, removing as much surface moisture as possible.
In a bowl, combine soy sauce, mirin, sake, freshly grated ginger, garlic powder, allspice, and white pepper. Add the dried shrimp and turn gently to coat every surface. Leave to marinate for 15 to 20 minutes at room temperature no longer. While the shrimp marinates, heat the oil for frying to 165°C, prepare the potato starch for dusting in a shallow bowl, and set up the wire rack beside the stove. After marinating, remove each shrimp from the bowl and dust lightly in potato starch on all sides, shaking off the excess. The shrimp should look lightly powdered, not thickly coated. Fry in batches as directed.
Standard Operating Procedure (SOP)
For consistent, restaurant-quality shrimp karaage every single time, follow this sequence: peel and devein shrimp, leave tails on → pat completely dry → sprinkle sake and rest 10 minutes → pat dry again → build marinade in bowl → add shrimp and coat gently → marinate 15–20 minutes maximum → prepare potato starch in shallow bowl → heat oil to 165°C → remove shrimp from marinade and shake off excess liquid → dust lightly in potato starch, shake off excess → first fry in batches of 4–5 at 165°C for 60–75 seconds until just cooked through and very lightly golden → drain on wire rack → increase oil to 185°C → second fry all pieces for 30–45 seconds until deeply golden and crackling → drain 15 seconds on wire rack → plate immediately → serve within 3 minutes. The four steps that most directly affect the quality are the sake moisture-drawing step (coating adhesion), potato starch over flour (crispiness character), the double fry (crust depth), and serving immediately (crust preservation). These four together are why properly made karaage tastes the way it does and why this recipe produces that result reliably.
For party batches, complete the first fry for all shrimp up to 60 minutes in advance and keep on a wire rack at room temperature uncovered, never stacked. Perform the second fry in batches of 8 to 10 shrimp as guests arrive. Each second-fry batch takes under a minute and produces a genuinely hot, freshly crackling plate. Set up the dipping sauce bowls, shredded cabbage, and lemon wedges in advance so the only thing left at serving time is the 45-second second fry and a 15-second drain.
Garnish and Presentation
The classic Japanese izakaya presentation for shrimp karaage is clean, confident, and based around contrast the deep golden colour of the fried shrimp against the pale green-white of finely shredded fresh cabbage, with a few simple garnishes that add freshness and acidity without cluttering the plate. Use a wide, flat ceramic plate or a wooden board. Build a small mound of very finely shredded cabbage dressed with a few drops of rice vinegar and a pinch of salt in the centre of the plate, and arrange the shrimp around it with the tails pointing outward the fan arrangement is both visually elegant and practical, allowing each guest to pick up their shrimp easily by the tail.
For garnish: a wedge of fresh lemon or yuzu on the side a squeeze of citrus over the shrimp immediately before eating brightens the whole flavour dramatically. A small bowl of Japanese kewpie mayonnaise with a drop of chilli oil drizzled over its surface is the most popular dipping sauce and looks immediately appetising in its small ceramic dish. A pinch of shichimi togarashi scattered over the shrimp adds colour and signals the spice profile. For a dinner party presentation, a few scattered leaves of micro shiso or fresh shiso leaf cut into thin ribbons adds a faintly citrusy, herby freshness that is very much in the spirit of Japanese plating philosophy.
Plating and Serving Tips
Serve shrimp karaage immediately within 3 minutes of the second fry, while the coating is at its most audibly crispy when you pick a piece up. For individual plating at a dinner table, five to six large shrimp per person is the right starter portion enough to experience the full flavour and texture without making the course too filling. Arrange with the tails pointing outward from the cabbage mound so every piece is accessible and the plate looks generous rather than crowded.
For a party sharing plate, arrange the shrimp in a circular fan pattern on a large, dark flat board with the tails pointing outward and the shredded cabbage in the centre. Place the Japanese mayo and ponzu dipping sauce bowls at opposite ends of the board, scatter a few lemon wedges between the shrimp, and add a pinch of shichimi over the whole plate just before bringing to the table. The golden shrimp fan is one of the most visually immediate and appetising party presentations in Japanese home cooking and takes less than five minutes to arrange.
If you make this shrimp karaage recipe, I genuinely want to hear every detail did the double-fry produce the crunch you were hoping for, did you try the allspice seasoning, which dipping sauce did the table prefer, did you make the honey lemon glaze variation? Leave a star rating below and drop a comment. Your notes help other readers get that juicy-inside, shatter-crispy-outside result at home and I read every single one. Save this to Pinterest now so it is always there for your next Japanese dinner night, party spread, izakaya-inspired evening, or the next time you want something genuinely beautiful and precisely delicious on the table in 30 minutes!
Ingredients
- 500g (1.1 lb) large or jumbo shrimp/prawns
- 1½ tablespoons soy sauce (or tamari for gluten-free)
- 1 tablespoon mirin (sweet Japanese rice wine)
- 1 tablespoon sake
- 1 teaspoon fresh ginger, finely grated
- ½ teaspoon garlic powder (NOT fresh garlic it burns on the shrimp surface)
- 3 tablespoons Japanese kewpie mayonnaise
- 1 tablespoon mirin
- 2 tablespoons soy sauce (or tamari)
- 1 tablespoon fresh lemon juice or yuzu juice
- A very small pinch of fine salt
- ¼ teaspoon white pepper powder
- ¼ teaspoon allspice powder
- ½ cup (60g) potato starch
Nutritional Information
- Calories: 185 kcal
- Protein: 22g
- Carbohydrates: 12g
- Fat: 5g
- Fiber: 0g
- Sodium: 520mg
- Sugar: 2g
Directions
1. PREPARE THE SHRIMP
If using frozen shrimp, ensure they are fully thawed and have been sitting in
a colander for at least 20 minutes to drain excess water. Whether using fresh
or thawed frozen shrimp, peel the shells from each shrimp leaving the final
tail segment intact — this creates the tail handle. Devein each shrimp by making
a shallow cut along the curved back and using the tip of the knife or a toothpick
to lift and remove the dark vein. Pat every shrimp completely dry on all sides
using kitchen paper — this is not optional. Any surface moisture at this stage
will interfere with the sake step and the coating adhesion that follows.
2. THE SAKE MOISTURE-DRAWING STEP
Place the dried shrimp in a bowl. Sprinkle 1 tablespoon of sake over them and
toss gently to ensure every shrimp is lightly coated. Leave at room temperature
for 10 minutes. The sake draws additional surface moisture from the shrimp
through osmosis, neutralises any residual fishiness from the proteins, and begins
adding a subtle depth of flavour before the main marinade goes on.
After 10 minutes, remove the shrimp and pat dry again with fresh kitchen paper,
removing all surface moisture that has been drawn out. The shrimp should feel
noticeably drier and firmer to the touch than before the sake step.
3. MARINATE THE SHRIMP
In a medium bowl, combine the soy sauce, mirin, sake (the tablespoon for the
marinade), grated ginger, garlic powder, allspice, and white pepper. Stir
briefly to combine. Add the dried shrimp and turn gently with your hands or a
spoon to ensure every surface of every shrimp is coated with the marinade.
Set a timer for 15 to 20 minutes — not longer. Leave at room temperature.
Do not refrigerate during marination — the cold temperature prevents the marinade
from penetrating the shrimp surface effectively in such a short time window.
The marinade will deepen in colour as the soy and mirin soak into the shrimp.
4. SET UP FOR FRYING
While the shrimp marinates, heat neutral oil in a deep, wide saucepan to 165°C.
Place the potato starch in a wide, shallow bowl or plate for dusting.
Set up a wire rack over a clean tray beside the stove for draining between fries
and after the second fry.
5. DUST THE SHRIMP IN POTATO STARCH
Remove each shrimp from the marinade one at a time and shake gently to remove
any excess liquid pooling on the surface. Hold the shrimp by its tail and lay
it in the potato starch, pressing lightly to coat all surfaces including the
sides and the underside. Lift the shrimp and tap or shake gently to remove all
excess starch — the final coat should be thin and even, not thick or lumpy.
The shrimp should look lightly powdered with a slightly matte surface — not
thickly white or pasty. Set each dusted shrimp aside on a clean plate while
you coat the rest. Work relatively quickly — the marinade moisture will begin
dissolving the starch if the coated shrimp sit too long before frying.
6. FIRST FRY (COOK THROUGH 165°C)
Test the oil by dropping in a small pinch of potato starch — it should sizzle
steadily and float to the surface within 3 to 4 seconds without browning
aggressively. Carefully lower 4 to 5 shrimp into the oil — holding each by
the tail and placing it away from you to prevent oil splatter.
Fry for 60 to 75 seconds per batch, turning once at the halfway point, until
the coating sets and turns a very pale golden colour. The shrimp should be just
barely cooked through — pink throughout, no translucency remaining — but NOT
deeply golden. The exterior should look set and dry, not wet or raw-looking.
Remove with a slotted spoon or tongs and transfer to the wire rack.
Repeat with all remaining shrimp. At this point, the first-fried shrimp can be
held on the wire rack at room temperature for up to 60 minutes before the second
fry. This is the make-ahead window for parties.
7. INCREASE OIL TEMPERATURE AND SECOND FRY (CRISP AND COLOUR 185°C)
Increase the oil temperature to 185°C. Test with a small piece of starch — it
should sizzle immediately and aggressively and float within 2 seconds. Once the
oil has reached 185°C, return all the first-fried shrimp to the oil simultaneously —
they are already cooked, so they can all go in at once for this final crisping step.
Fry for exactly 30 to 45 seconds, nudging the shrimp gently to ensure even colour.
The coating should turn a deep, rich golden colour and the surface should look
lacquered and crackling. Remove immediately with a slotted spoon or tongs and
drain on the wire rack for 10 to 15 seconds only — no longer.
8. PLATE AND SERVE IMMEDIATELY
Arrange the shredded cabbage in a small mound in the centre of the serving plate.
Arrange the shrimp in a fan pattern around the cabbage with the tails pointing
outward. Place the dipping sauce bowl(s) at the side of the plate. Add a lemon
or yuzu wedge. Scatter a pinch of shichimi togarashi and sesame seeds over the
shrimp. Add a few shiso ribbons if using. Serve within 3 minutes of the second fry.
Rate this Recipe
User Reviews
No reviews yet. Be the first to share your thoughts!