Chicken Karaage Recipe That Fries Up Shatteringly Crispy and Juicy
Make authentic Japanese chicken karaage at home with this soy-mirin marinade and double-fry technique. Crispy, juicy, restaurant-style. Get the full recipe now.
 Tripti Srivastava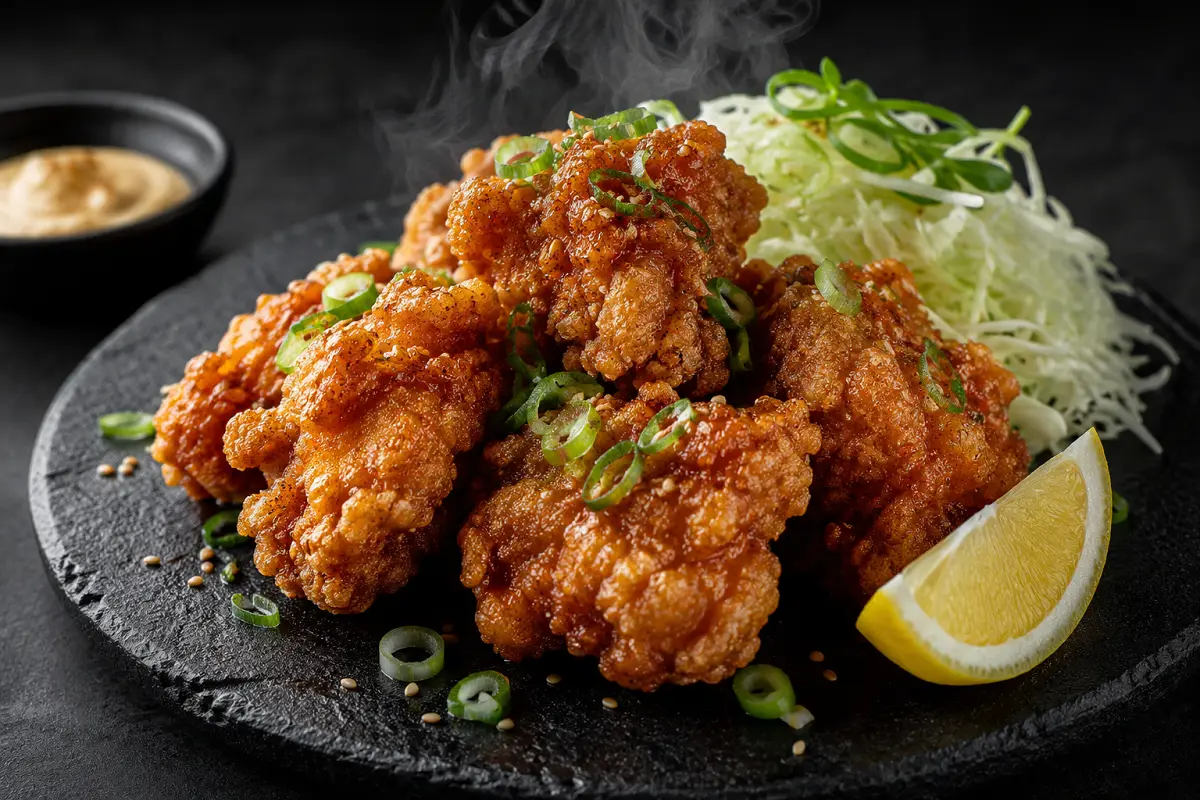
If you have ever been to a Japanese izakaya one of those warm, noisy, convivial gastropubs that exist on nearly every street in Japan's cities you already know that chicken karaage is almost always the first thing ordered, and almost always the first thing finished. Bite-sized pieces of boneless chicken thigh, marinated in a deeply savoury soy-mirin-ginger mixture, coated in potato starch, and fried to a crust so crispy it almost shatters served with a wedge of lemon and a bowl of Japanese mayonnaise that exists specifically to be eaten with this chicken and nothing else.
Karaage is Japan's most beloved home-cooked and restaurant fried chicken, and the reason it is so consistently excellent is that the recipe is not trying to do too many things at once. The marinade is simple soy, mirin, sake, ginger, garlic. The coating is simple potato starch. The cooking technique is precise two fries at two temperatures with a specific rest between them. The result of these simple, well-executed elements is a fried chicken that has a crust thinner and crisper than any other style, a juiciness that comes from the thigh meat and the marinade working together, and a flavour that is savoury, slightly sweet, and ginger-forward in a way that is distinctly and unmistakably Japanese.
This recipe gives you the complete professional karaage method: the marinade ratios that produce the right soy-ginger depth without overpowering the chicken, the potato starch coating technique that creates the signature cragged, irregular crust, the precise double-fry temperatures and timings, and a kewpie mayo dipping guide with three variations for different occasions from the classic plain kewpie with lemon to a spiced togarashi mayo for a more contemporary izakaya presentation.
What Makes This Chicken Karaage Special
Karaage is genuinely different from every other fried chicken tradition Korean, American, Indian and the differences are not superficial. Here is what makes this recipe work at the level it does:
- Potato starch, not cornstarch: This is the single most important ingredient decision in the entire recipe. Potato starch has a larger granule size than cornstarch and absorbs moisture differently during frying it creates a lighter, more irregular, craggier crust with sharper, more defined texture peaks that hold their crispiness significantly longer than a cornstarch coating. Cornstarch produces a smooth, sealed crust; potato starch produces the rough, shatteringly crispy surface that is karaage's defining characteristic. Serious Eats' food science testing confirmed potato starch produces measurably superior crispiness retention over time compared to cornstarch.
- Chicken thigh, not breast: The higher fat content of boneless chicken thigh keeps the meat juicy through the high-heat double-frying process. Chicken breast dries out before the coating fully crisps and produces a tough, dry interior that is the opposite of what karaage should be.
- Sake in the marinade: Sake does two things simultaneously in the karaage marinade its alcohol breaks down the chicken proteins slightly for better tenderisation, and it evaporates during frying, leaving behind a subtle fermented sweetness that deepens the overall flavour. If sake is unavailable, dry sherry is a reasonable substitute, though the flavour difference is noticeable to anyone who knows authentic karaage.
- The double-fry at precisely controlled temperatures: First fry at 160°C to cook the chicken through without browning the crust. Rest for 3 minutes. Second fry at 190°C for 60–90 seconds to achieve the shattering, golden crust that defines restaurant karaage. The rest between fries is essential it allows residual heat to finish cooking the interior so the second fry focuses entirely on the crust.
- Irregular coating technique: Rather than pressing the potato starch into a uniform coating, the pieces are tossed in the starch and shaken any loose starch is deliberately left on. The loose starch bits create the irregular, cragged surface that characterises authentic karaage and gives it its distinctive texture.
Ingredients Overview
Boneless chicken thighs skin-on for maximum flavour and crunch, or skinless depending on preference are cut into irregular, roughly 4cm pieces. The irregular size is traditional and intentional: different surface areas and thicknesses create a variety of crust textures in the finished dish, from paper-thin edges to substantial chunky centres. Do not cut the pieces uniformly square karaage is a rustic, informal dish and the irregular cut is part of its character.
The marinade uses three Japanese pantry staples: soy sauce for salt and umami depth, mirin for sweetness and gloss, and sake for tenderising and flavour depth. Fresh ginger grated finely (not garlic-pressed or powdered) adds the bright, sharp ginger note that is the most distinctive flavour cue of authentic karaage. Garlic is grated as well the combination of grated ginger and garlic produces a more aromatic, penetrating marinade than minced or paste equivalents.
Potato starch (katakuriko) is available at Japanese and Asian grocery stores and increasingly at mainstream supermarkets in the Asian foods section. Do not substitute cornstarch if you want authentic karaage texture the difference in crust quality is significant and worth the small effort of finding potato starch. If absolutely unavailable, a 50/50 mix of cornstarch and plain flour produces a reasonable approximation.
How to Make It
Marinate the chicken for minimum 2 hours, overnight preferred. Drain and coat in potato starch using the toss-and-shake technique. First fry at 160°C until cooked through. Rest 3 minutes. Second fry at 190°C for 60–90 seconds until the crust is golden, cragged, and shattering. Drain on a wire rack. Serve immediately with lemon and kewpie mayo.
The active cooking time is just 20 minutes. The marinade and the double-fry rest do everything else.
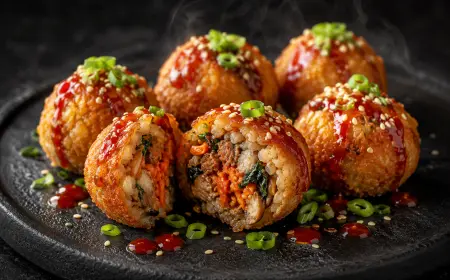
Also Read: Bibimbap balls Recipe
Tips for Best Results
- Do not wipe the marinade off the chicken before coating. Unlike some fried chicken recipes where the marinade is patted dry, karaage is coated with potato starch while still wet from the marinade. The wet surface helps the starch adhere and creates the characteristic uneven, cragged coating. Too much excess marinade will make the coating soggy, but a thin wet film on the surface is exactly right.
- Coat and fry immediately do not let the coated chicken sit. Potato starch begins to absorb moisture from the chicken surface within minutes of application, which makes the coating wet and gummy. Coat each piece and get it into the oil within 2–3 minutes.
- Use a thermometer. The temperature differential between the two frying stages (160°C and 190°C) is the technical foundation of the double-fry method. Guessing oil temperature is the most common cause of karaage with a pale, soft crust at the first fry or a burnt exterior and undercooked interior at the second.
- Fry in small batches 6–8 pieces maximum. Crowding the oil drops the temperature sharply and the coating absorbs oil before it can form a crust. The oil should return to temperature within 60 seconds of adding each batch.
- Drain on a wire rack, never on kitchen paper. Kitchen paper traps steam under the chicken, which softens the bottom crust within seconds. A wire rack lets air circulate underneath and the crust stays crispy on all surfaces.
Serving Suggestions
Karaage is served at the table in Japan in three primary ways: as an izakaya starter with lemon and kewpie mayo; in a bento box with rice, pickled ginger, and a simple salad; or as a donburi a bowl of hot rice topped with the karaage pieces, a drizzle of tare sauce, sliced spring onion, and a soft-boiled egg. All three formats are addressed in the plating guide below.
For the classic izakaya presentation, pile the karaage high on a small wooden board or in a basket lined with wax paper, add a generous wedge of lemon and a ramekin of kewpie mayo, and scatter shichimi togarashi (Japanese seven-spice blend) over the top. For a full Japanese home dinner, serve alongside a bowl of miso soup, steamed short-grain rice, and a simple cucumber and wakame salad dressed with rice vinegar and sesame oil.
Storage and Reheating
Store cooked karaage in an airtight container in the fridge for up to 2 days. To reheat and restore the crust, place on a wire rack in an oven preheated to 200°C for 8–10 minutes, or in the air fryer at 190°C for 5–6 minutes. Both methods restore a significant amount of the original crispiness. The microwave softens the crust irreversibly and is not recommended for reheating karaage.
Raw marinated chicken can be frozen for up to 2 months in a zip-lock bag with the marinade. Defrost overnight in the fridge, coat in potato starch, and fry as per the directions. Do not freeze already-coated chicken the potato starch coating becomes wet and unworkable on thawing.
For a make-ahead party strategy, complete the first fry up to 2 hours before the event. The first-fried chicken can rest at room temperature on a wire rack for this entire window without quality loss. Execute the second fry in 2-minute batches during the 10 minutes before service this is how izakaya kitchens serve freshly fried karaage to order throughout an evening without constant marinating and coating.
Variations and Substitutions
- Spicy karaage: Add 1 teaspoon of ichimi togarashi (Japanese chilli powder) or gochugaru (Korean red pepper flakes) to the marinade for a gently spiced variation. For a more intense heat, add ½ teaspoon of doubanjiang (Chinese fermented chilli bean paste) this adds both heat and a savoury fermented depth that pairs exceptionally well with the soy-mirin marinade.
- Karaage don (rice bowl): Serve the karaage pieces over hot steamed rice in a wide bowl with a drizzle of mentsuyu tare (dashi-soy-mirin sauce), thinly sliced spring onion, pickled ginger, a soft-boiled egg halved, and a squeeze of kewpie mayo. This is one of the great Japanese comfort food bowls and takes 5 minutes to assemble from cooked karaage.
- Air fryer karaage: Coat the chicken as directed and spray generously with neutral oil on all surfaces. Air fry at 200°C for 12 minutes, flip, spray again, and air fry for a further 8–10 minutes until deeply golden and crispy. The air fryer version is notably less crispy than the double-fried original but is excellent for a lighter everyday version.
- Tofu karaage (vegan): Replace the chicken with firm, well-pressed tofu cut into irregular pieces. Marinate for 1 hour only. Follow the exact same coating and double-fry technique. The tofu karaage has a significantly lighter interior than the chicken version but the crust is identical this is one of the best vegan fried preparations in Japanese cooking.
- Karaage sandwich (Japanese convenience store style): Place two or three pieces of freshly fried karaage in a soft milk bread roll (shokupan) with a generous squeeze of kewpie mayo, shredded cabbage dressed with rice vinegar, and a thin slice of tomato. This is the Japanese convenience store sando format and is one of the most satisfying sandwiches in the world.
Preparation Method
Cut the chicken thighs into irregular 4cm pieces aim for a variety of sizes rather than uniform cubes. The irregular cut creates different surface-area-to-volume ratios in the pan, which produces a variety of crust thicknesses and textures in the finished dish. Combine all marinade ingredients in a bowl, add the chicken, and massage the marinade thoroughly into every surface. Cover and refrigerate.
When ready to fry, take the chicken directly from the marinade bowl and toss each piece in a tray of potato starch. Shake off the loose excess but do not press the coating flat the loose bits are what create the cragged surface. Have the oil at temperature before the first piece is coated, and work quickly from coat to oil.
Standard Operating Procedure (SOP)
Step 1 Chicken prep: Cut boneless chicken thighs into irregular 4cm pieces. Skin-on preferred. Pat lightly with kitchen paper not bone-dry, just remove large pools of surface moisture.
Step 2 Marinade: Combine soy sauce, mirin, sake, grated ginger, grated garlic, sesame oil, and white pepper in a bowl. Add chicken. Massage thoroughly. Cover and refrigerate minimum 2 hours, overnight optimal.
Step 3 Prepare frying setup: Heat oil in a deep heavy pan to 160°C. Set up: a wide tray with potato starch, a spider strainer or tongs, and a wire rack over a tray for draining.
Step 4 Coat in potato starch: Working with one piece at a time, lift from marinade and drop into the starch tray. Turn to coat all surfaces. Shake once to remove loose excess do not press. The coating should be uneven and slightly cragged. Fry within 2 minutes of coating.
Step 5 First fry at 160°C: Fry 6–8 pieces per batch for 3–4 minutes until cooked through and pale golden. The crust will look set but not deeply coloured this is correct. Remove to wire rack. Allow oil to return to 160°C before next batch.
Step 6 Rest 3 minutes: This is the rest between fries. Residual heat finishes the interior. Do not skip or rush this step.
Step 7 Second fry at 190°C: Increase oil temperature to 190°C. Return all first-fried pieces to the oil simultaneously. Fry for 60–90 seconds maximum, turning once, until deeply golden and the crust sounds crispy when tapped. The surface should look rough and cragged with defined texture peaks.
Step 8 Drain immediately: Remove to wire rack. Season immediately with a light sprinkle of salt and a squeeze of lemon while still hot the heat helps the seasoning adhere.
Step 9 Plate and serve within 5 minutes. Karaage crust quality peaks within 3–4 minutes of the second fry and begins to soften after 10 minutes.
Garnish and Presentation
Karaage's visual identity is built on the irregular, golden-brown, craggy surface of the fried chicken and the presentation should celebrate this texture rather than cover it. The garnish is minimal by design: a wedge of fresh lemon (the citrus is squeezed directly over the hot chicken at the table, which lifts the richness and brightens the soy-ginger notes), a ramekin of kewpie mayonnaise, and a light dusting of shichimi togarashi (Japanese seven-spice blend) over the finished chicken.
The lemon presentation matters: use a small wedge cut from the side of the lemon rather than a half a wedge has more visual elegance and is easier to squeeze. Alternatively, use a thin lemon round placed flat on the chicken pile this is the izakaya plating style that allows guests to pick it up and squeeze directly. A small bunch of fresh flat-leaf parsley or shiso leaves tucked alongside adds a fresh green counterpoint to the golden-brown chicken and is the traditional Japanese garnish for karaage.
Plating and Serving Tips
For the classic izakaya party platter format, line a small wooden board, a shallow basket, or a flat ceramic plate with a sheet of wax paper or a bamboo leaf. Pile the karaage high the height of the pile is part of the visual. It should look generous and slightly abundant, not carefully arranged. Tuck a lemon wedge against the pile, place a small ramekin of kewpie mayo at the side, dust with shichimi togarashi, and add a few shiso leaves or flat-leaf parsley sprigs. This informal, pile-high presentation is authentic to how karaage appears in every izakaya in Japan and it is one of the most naturally photogenic food presentations there is.
For a sit-down dinner plating, arrange 5–6 pieces on a flat plate in a loose grouping not stacked, not in a row. Place a half-lemon beside the chicken. Pipe or spoon a small mound of kewpie mayo to one side. Add a small pile of finely shredded cabbage dressed lightly with rice vinegar and a drop of sesame oil. Dust shichimi togarashi over both the chicken and the cabbage. This composed plating elevates karaage from casual party food to a considered appetizer course.
For the bento format, arrange cooled karaage pieces in one compartment of a bento box. Add a section of steamed short-grain rice pressed into a compact rectangle, a small mound of pickled ginger, a few cucumber slices, and a mini ramekin of soy sauce. The compartmentalised bento presentation is one of the most satisfying ways to eat karaage each element stays distinct, the flavours are clear and separate, and the whole box feels considered and nourishing. Karaage in a bento is genuinely one of the great portable meal experiences.
Made this chicken karaage? That sound when the first piece comes out of the second fry that sharp, crackling crunch when you tap it is the sound you are chasing. Leave a star rating and a comment below; it helps other readers find this recipe. Tag us on Instagram with your pile of golden karaage we share every single one.
Ingredients
- 700g boneless chicken thighs, skin-on preferred
- 3 tablespoons Japanese soy sauce (koikuchi shoyu) or light soy sauce
- 2 tablespoons sake (or dry sherry as substitute)
- 1½-inch piece fresh ginger, finely grated (include the juice)
- ½ teaspoon white pepper powder
- 1 teaspoon toasted sesame oil
- 3 cloves garlic, finely grated
- 2 tablespoons mirin (sweet Japanese rice wine)
- ½ teaspoon sugar (optional adds a slight extra gloss to the crust)
Nutritional Information
- Calories: 368 kcal
- Protein: 28g
- Carbohydrates: 18g
- Fat: 20g
- Fiber: 0.5g
- Sodium: 590mg
- Sugar: 4g
Directions
1. PREP THE CHICKEN
1. Place boneless chicken thighs on a cutting board. Cut each thigh into irregular pieces approximately 4cm across — vary the size deliberately. Some pieces should have a thin edge (which will crisp paper-thin), some should be chunky (which will have a thicker, more substantial interior). Do not cut into uniform squares — the irregular cut is traditional and important for texture variety.
2. Pat the pieces lightly with kitchen paper to remove large surface pools of moisture. Do not dry completely — a thin film of moisture on the surface is what helps the potato starch adhere correctly.
2. MAKE THE MARINADE
3. In a large mixing bowl, combine soy sauce, mirin, sake, finely grated ginger (include all the juice from grating), finely grated garlic, sesame oil, white pepper, and sugar if using.
4. Whisk until the sugar dissolves. Taste the marinade — it should be deeply savoury, slightly sweet from the mirin, and bright with ginger aroma.
5. Add the chicken pieces to the marinade. Using your hands, massage the marinade thoroughly into every surface of every piece.
6. Cover tightly with cling film and refrigerate for a minimum of 2 hours. Overnight (8–12 hours) produces noticeably more flavourful, tender, and better-coloured karaage — if planning ahead, overnight is always the better choice.
3. PREPARE ALL COMPONENTS BEFORE FRYING
7. Set up your frying station: a deep heavy pan or wok, your oil, a kitchen thermometer, a wide flat tray with the potato starch spread in an even layer, a spider strainer or tongs, and a wire rack set over a tray for draining. Have the lemon, shichimi togarashi, and kewpie mayo ready.
8. Mix any kewpie mayo variation sauces and portion into ramekins. Set aside.
4. HEAT OIL FOR FIRST FRY
9. Pour neutral oil into the heavy pan to a depth of at least 6cm. Heat over medium-high heat to precisely 160°C. Use a kitchen thermometer — this temperature is the foundation of the double-fry method and guessing will compromise the result.
5. COAT THE CHICKEN IN POTATO STARCH
10. Remove the marinated chicken from the fridge. Working with one piece at a time, lift a piece from the marinade (allow excess to drip back, but do not wipe or shake aggressively) and place it in the potato starch tray.
11. Turn the piece to coat all surfaces. Toss it lightly in the starch — do not press the coating flat or smooth it down. The goal is an uneven, slightly lumpy coating with some loose starch bits on the surface. These irregular bits are what create the cragged, crunchy karaage crust.
12. Hold the coated piece over the tray and shake it once to remove any very heavy excess starch that might fall off in the oil. Place immediately on a clean tray.
13. Work quickly from coating to frying — coated pieces should be in the oil within 2–3 minutes of being coated. Starch absorbs surface moisture rapidly and a piece left too long will have a wet, gummy coating that never properly crisps.
6. FIRST FRY AT 160°C
14. Gently lower 6–8 coated pieces into the 160°C oil. Do not crowd — the pieces should not touch each other.
15. Fry for 3–4 minutes, turning once or twice with tongs or a spider strainer, until the chicken is cooked through and the coating is set and pale golden. The crust will look light and slightly rough — not deeply coloured. This is correct.
16. To check doneness, cut the largest piece — the interior should show no pink and the juices should run clear. Internal temperature should be 74°C.
17. Remove with a spider strainer and place on the wire rack. Do not stack.
18. Allow the oil to return to 160°C before frying the next batch. This takes 60–90 seconds. Repeat until all chicken is first-fried.
7. REST BETWEEN FRIES 3 MINUTES MINIMUM
19. Allow all first-fried pieces to rest on the wire rack for a minimum of 3 minutes. This rest is the most important step between the two fries — residual heat from the first fry continues to cook the interior of the chicken during this window, which means the second fry can focus entirely on crust development rather than interior cooking. Do not skip or shorten this rest.
8. SECOND FRY AT 190°C
20. Increase the oil temperature to 190°C.
21. Return all rested first-fried pieces to the hot oil simultaneously — the full batch together.
22. Fry for 60–90 seconds, turning once at the halfway mark. Watch carefully — at 190°C, the colour develops rapidly. The target is a deep, rich amber-gold with a rough, cragged surface that looks almost lacey in texture.
23. Tap a piece with your tongs or a chopstick — a well-fried piece will make a sharp, clicking sound against the tongs. This sound indicates the crust has fully crisped and dehydrated.
24. Remove immediately to the wire rack. Do not allow to go dark brown.
9. SEASON IMMEDIATELY POST-FRY
25. While the karaage is still hot on the wire rack, season lightly with flaky sea salt and a squeeze of lemon juice. The heat of the chicken helps the seasoning penetrate the crust surface.
26. Dust with shichimi togarashi immediately before plating — not before, as the moisture in the shichimi can slightly soften the very surface of the crust if applied too early.
10. PLATE AND SERVE
27. For izakaya format: line the serving board or basket with wax paper. Pile the karaage high — the height is part of the presentation. Tuck a lemon wedge against the pile. Place kewpie mayo ramekin alongside. Dust with shichimi togarashi. Add shiso leaves or parsley.
28. For rice bowl (karaage don): spoon steamed rice into a wide bowl. Arrange karaage pieces over the rice. Drizzle mentsuyu tare or soy sauce lightly over the chicken. Add a soft-boiled egg half. Scatter spring onions. Squeeze kewpie mayo in a line across the chicken. Serve immediately.
29. Serve within 5 minutes of the second fry for peak crust quality.
Rate this Recipe
User Reviews
No reviews yet. Be the first to share your thoughts!