Chilli Paneer Recipe That Delivers Crispy Flavour in Every Bite
Make restaurant-style chilli paneer at home, crispy fried paneer cubes in a bold Indo-Chinese sauce. Dry or gravy version included. Get the full recipe now.
 Tripti Srivastava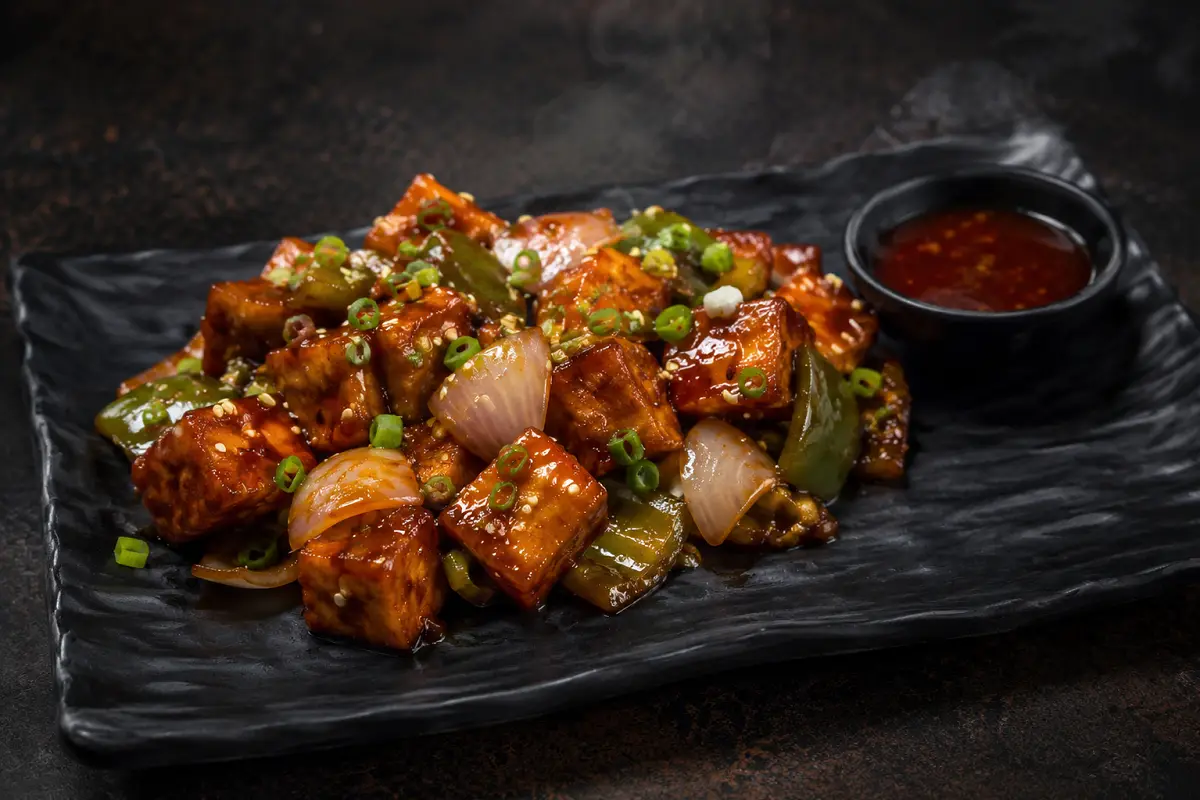
If there is one dish that every Indo-Chinese restaurant in India does well and that every home cook wants to nail it is chilli paneer. Golden, crispy-edged cubes of paneer tossed in a bold, glossy sauce that hits sweet, sour, salty, and spicy all at once. A dish that works as a starter, as a side with fried rice or noodles, or simply on its own with toothpicks and a cold drink at a party.
The challenge with chilli paneer at home has always been the same: the paneer goes soft, the batter slides off, the sauce turns thin and watery, or the whole thing tastes flat compared to the restaurant version you are trying to recreate. Every one of those problems has a specific fix, and this recipe addresses all of them from the batter formula that stays crispy for longer than standard cornflour coatings to the wok-heat principle that creates the signature smokiness Indo-Chinese cooking is known for.
This recipe gives you both versions the dry chilli paneer (the appetizer format, where the sauce clings to and coats every piece without any pooling liquid) and the gravy chilli paneer (the main course format, with a generous amount of glossy sauce that pairs beautifully with steamed rice or noodles). One recipe, two presentations, and complete instructions for both.
What Makes This Chilli Paneer Special
Chilli paneer is one of the most searched Indo-Chinese recipes in India and also one of the most inconsistently executed. Here is what this recipe does to get the result right every time:
- The cornstarch-maida batter with egg white: A batter of cornstarch, plain flour, soy sauce, white pepper, and egg white (or aquafaba for a vegan version) creates a coating that fries to a significantly crispier, more durable crust than a dry cornstarch dusting alone. The egg white acts as a structural binder that prevents the crust from separating from the paneer during the sauce-tossing step which is where most home versions fall apart.
- Double fry for lasting crunch: A first fry to set the batter and colour the crust, followed by a second short fry at higher temperature just before tossing in the sauce, means the paneer stays crispy even after being coated in the sauce not soft, not soggy, but genuinely textured.
- The wok hei principle: Chilli paneer gets its distinctive smoky, slightly charred edge from cooking at the highest possible heat in a very hot wok. This high-heat char is what Chinese chefs call "wok hei" the breath of the wok. You can achieve it at home with any high-BTU gas burner by ensuring the wok is screaming hot before anything goes in and never crowding the pan.
- Sauce balance formula: The sauce in this recipe is built on a precise ratio of soy sauce (salt and depth), rice vinegar (acidity), sugar (sweetness), chilli sauce (heat), and oyster sauce (umami body). Getting this balance right is what gives restaurant chilli paneer its addictive, multi-layered flavour. The recipe includes tasting checkpoints so you can adjust the balance to your specific preference.
- Dry vs gravy switch: The only difference between the dry and gravy version is the quantity of cornstarch slurry added at the end. This single adjustment gives you complete control over the sauce consistency and full instructions for both are included.
Ingredients Overview
The star ingredient is firm paneer, cut into rectangles approximately 2.5cm x 2cm x 1.5cm. This size gives you the best surface-area-to-volume ratio for frying large enough to have a distinct interior texture, small enough to fry through quickly and coat evenly in the sauce. If your paneer feels soft, press it between two plates with a weight for 20 minutes before cutting firmer paneer fries to a better crust and holds its shape through the wok-tossing step.
The sauce is built on the Indo-Chinese pantry trinity: soy sauce for saltiness and colour, rice vinegar for the sharp tangy note, and chilli sauce for heat. Oyster sauce adds the umami depth that distinguishes a restaurant sauce from a flat home version if you need a vegetarian oyster sauce substitute, mushroom oyster sauce is a direct and excellent replacement. Sesame oil goes in at the very end, off the heat it is volatile and its toasty fragrance evaporates instantly over high heat, so adding it at the finish is what gives the dish its characteristic aroma.
The vegetables green and red bell peppers and onion are cut into large squares and added to the wok at high heat for just 2–3 minutes. They should retain their crunch and bright colour overcooked, limp peppers are one of the most common signs of a poorly executed chilli paneer. Understanding how wok heat works at home is the single biggest upgrade you can make to your Indo-Chinese cooking.
Also Read: Chicken Spring Roll Recipe
How to Make It
Coat the paneer in the batter and fry until golden. In the same wok, stir-fry the aromatics and vegetables over maximum heat, build the sauce, return the fried paneer, toss to coat, add the cornstarch slurry to your preferred consistency, finish with sesame oil, and serve immediately. The entire wok-cooking stage takes about 8 minutes have everything measured and ready before you light the burner.
Mise en place having everything prepped and in position before you start the wok is not just good practice for this recipe. It is essential. Indo-Chinese wok cooking moves faster than almost any other cooking style, and stopping mid-cook to measure a sauce ingredient means the garlic burns and the vegetables overcook.
Tips for Best Results
- Pat the paneer completely dry before battering. Surface moisture creates steam between the paneer and the batter, which is what causes the crust to separate and slide off during frying and wok-tossing. This is the most important single step in the entire recipe.
- Fry in small batches. Adding too much paneer at once drops the oil temperature below the crisping threshold. Fry 8–10 pieces maximum per batch, allow the oil to return to temperature, then fry the next batch.
- Get the wok genuinely hot before adding oil. Heat the empty wok over maximum heat for 90 seconds until you see the first wisps of smoke rising from the surface then add the oil. This is how you achieve wok hei at home.
- Never add the cornstarch slurry directly to a boiling liquid. Stir the slurry in a cup immediately before adding cornstarch settles to the bottom very quickly. Add it in a thin, steady stream while stirring the sauce constantly, and reduce the heat slightly as you add it.
- Serve immediately. Chilli paneer both dry and gravy versions loses its textural contrast within 10–15 minutes of plating. The batter crust softens as it absorbs the sauce moisture. Serve the moment it leaves the wok.
Serving Suggestions
Dry chilli paneer works best as a starter or appetizer serve it in a shallow bowl or on a flat plate with toothpick skewers inserted into each piece for easy party eating, and a small ramekin of extra chilli sauce alongside for dipping. The dry version also makes an outstanding filling for kathi rolls wrap in a roomali roti with thinly sliced onion and a squeeze of lemon for a street-food style meal that takes 2 minutes to assemble.
Gravy chilli paneer is a natural partner to vegetable fried rice or hakka noodles the glossy sauce coats the rice or noodles beautifully and the crispy paneer provides textural contrast against the soft grains. For a full Indo-Chinese banquet spread, serve alongside spring rolls, Manchurian, and sweet corn soup as a vegetarian feast that covers every flavour note crispy, saucy, sweet, spicy, and sour.
Storage and Reheating
Store cooked chilli paneer in an airtight container in the fridge for up to 2 days. The paneer batter crust will soften overnight this is unavoidable with any battered and sauced dish. To reheat and partially restore crispiness, spread the pieces on a baking tray and heat in the oven at 200°C for 8–10 minutes, or in the air fryer at 190°C for 5–6 minutes. The crust will firm up again significantly, though not quite to fresh-fried level.
The best make-ahead strategy for a party is to fry the paneer completely and store it in an airtight container. Make the sauce base (without the cornstarch slurry) and store separately. Thirty minutes before serving, heat the wok, stir-fry the vegetables, add the sauce base, stir in the slurry, return the pre-fried paneer, toss for 2 minutes, and serve. This approach means the paneer gets a hot wok-toss right before service and the crust quality is close to freshly made.
Variations and Substitutions
- Chilli tofu: Replace the paneer with firm, well-pressed tofu cut into the same size pieces. Press the tofu for at least 30 minutes to remove excess water, then follow the exact same batter and frying method. The tofu absorbs the sauce even more readily than paneer reduce the salt in the sauce slightly as tofu is more porous. This is a fully vegan version when using aquafaba instead of egg white in the batter.
- Chilli mushroom: Use large button or oyster mushrooms halved and patted completely dry. Skip the pressing step. The batter adheres differently to mushrooms add an extra teaspoon of cornstarch to the batter mix and fry at a slightly lower temperature (160°C) for a more even crust.
- Schezwan chilli paneer: Replace the regular chilli sauce in the sauce formula with an equal amount of Schezwan sauce and add half a teaspoon of Schezwan pepper to the wok with the aromatics. The result is a deeply fiery, numbing-spiced variation that is significantly bolder than the standard version.
- Chilli paneer with noodles (one-pan version): Add 200g of par-cooked hakka noodles to the wok after tossing the paneer in the sauce. Stir-fry everything together for 2 minutes. This one-pan version is an excellent weeknight dinner that combines the chilli paneer and the noodle side dish into a single plate.
- Baked chilli paneer (lighter version): Skip the frying entirely. Toss the marinated paneer in the batter, spread on a lined baking tray, spray generously with oil, and bake at 220°C for 20 minutes, flipping halfway, until golden and slightly crispy. Then toss in the prepared sauce as normal. The result is noticeably less crispy than the fried version but significantly lighter and very satisfying.
Preparation Method
Cut the paneer into even rectangular pieces and pat every surface bone-dry. Make the batter cornstarch, plain flour, egg white, soy sauce, white pepper, and just enough cold water to achieve a thick, coating consistency. It should coat the back of a spoon and hold without dripping. Too thin and it slides off the paneer in the oil; too thick and it forms a doughy, heavy crust rather than a light, crispy one.
While the paneer fries, measure and combine all your sauce ingredients in a single bowl this is your sauce mix. Measure the cornstarch slurry (separately) and keep it ready. Prep the garlic, ginger, green chillies, bell peppers, and onion. When the wok goes on the heat, you are 8 minutes from a finished dish.
Standard Operating Procedure (SOP)
Step 1 Paneer prep: Press if needed. Cut into 2.5cm x 2cm x 1.5cm rectangles. Pat every surface completely dry with kitchen paper.
Step 2 Make batter: Combine cornstarch, plain flour, egg white (or aquafaba), soy sauce, white pepper, salt, and cold water. Whisk to a smooth, thick, coating batter. Coat paneer pieces and let sit 5 minutes.
Step 3 First fry: Heat oil to 170°C. Fry paneer in small batches for 3–4 minutes until pale golden and the batter is set. Drain on a wire rack. Allow oil to return to temperature between batches.
Step 4 Second fry: Increase oil to 185°C. Re-fry the pale-golden paneer pieces for 60–90 seconds until deeply golden and crispy. Drain on a wire rack. Set aside.
Step 5 Combine sauce ingredients: In one bowl, mix soy sauce, oyster sauce, chilli sauce, rice vinegar, sugar, white pepper, and water. Taste and adjust balance. In a second bowl, mix cornstarch slurry (separate from sauce).
Step 6 Heat the wok: Place wok over maximum heat for 90 seconds until wisps of smoke appear. Add oil. Swirl to coat.
Step 7 Aromatics: Add garlic, ginger, and green chillies simultaneously. Stir-fry for 30 seconds no longer. They should be fragrant and lightly golden, not brown.
Step 8 Vegetables: Add onion squares and bell pepper squares. Stir-fry over maximum heat for 2 minutes until the edges start to char very lightly but the vegetables retain their crunch and colour.
Step 9 Sauce: Pour in the sauce mix. Stir to combine with the vegetables. Bring to a rapid boil 30–45 seconds.
Step 10 Slurry and consistency: For dry version: add half the cornstarch slurry, stir, and toss until the sauce thickly coats the vegetables with very little pooling liquid. For gravy version: add all the cornstarch slurry and stir until a glossy, flowing sauce forms.
Step 11 Return paneer: Add the double-fried paneer pieces. Toss gently but quickly for 60 seconds to coat every piece in the sauce without breaking the crust.
Step 12 Finish and plate: Remove from heat. Add sesame oil. Toss once. Add spring onion greens. Plate immediately. Garnish and serve within 5 minutes.
Garnish and Presentation
Chilli paneer is one of the most visually vibrant dishes in the Indo-Chinese repertoire the glossy, deep-red sauce, the bright green and red peppers, the golden paneer, and the white onion create a colour palette that looks genuinely restaurant-quality without any additional effort on the garnish front.
The key garnishes are thinly sliced spring onion greens scattered generously over the finished dish (added just before serving so they stay bright green and do not wilt into the sauce), a scattering of toasted sesame seeds for visual texture and a nutty finish, and a few thin slices of fresh red chilli for a colour echo of the sauce. A final drizzle of sesame oil over the plated dish adds a glossy sheen and reinforces the toasty aroma.
For the dry version specifically, insert cocktail toothpick skewers into 4–5 of the pieces before serving this immediately signals to guests that this is a pick-up-and-eat appetizer and makes the platter significantly easier to engage with at a party.
Plating and Serving Tips
For the dry version as a party starter, serve in a shallow wide bowl or on a flat black ceramic plate. The dark background makes the glossy red-orange sauce and golden paneer pop visually. Arrange the pieces so the golden crust sides face upward not the flat bottom. Scatter spring onion greens and sesame seeds generously, add the red chilli slices, and insert toothpick skewers into several pieces. Place the bowl in the centre of the table so guests can reach from all sides.
For the gravy version as a main course pairing, serve in a deep round bowl with a generous ladle of sauce pooled at the base. Arrange the paneer pieces in the centre so they sit proud of the sauce rather than being submerged in it this keeps the crust visible and signals textural contrast before the first bite. Add the spring onion, sesame, and chilli garnish over the top and serve immediately alongside a bowl of steamed rice or noodles.
For individual plating at a sit-down dinner, spoon a neat mound of fried rice onto the centre-left of a wide flat plate and arrange 6–8 pieces of chilli paneer (dry version) in a slight fan on the centre-right with the sauce brushed not pooled over them. This plating format shows both dishes at their best and gives the plate the visual balance of a composed restaurant starter course.
Made this chilli paneer? I want to hear the moment that first crispy piece hits the sauce. Leave a star rating and a comment below it genuinely helps other readers find this recipe. Tag us on Instagram with your wok shots the glossier the sauce, the better!
Ingredients
- 400g firm paneer block, cut into 2.5cm x 2cm x 1.5cm rectangles
- 4–5 tablespoons cold water
- 3 tablespoons cornstarch (cornflour)
- 2 tablespoons plain flour (maida)
- 1 egg white (or 3 tablespoons aquafaba for vegan version)
- ½ teaspoon white pepper powder
- 1 tablespoon light soy sauce
- ½ teaspoon salt
- Neutral oil for deep frying
- 1 teaspoon sugar
- 1½ tablespoons chilli sauce (sriracha or Chinese chilli garlic sauce)
- 1 tablespoon oyster sauce (or mushroom oyster sauce for vegetarian)
- 2 tablespoons light soy sauce
- 1 tablespoon dark soy sauce
- ½ teaspoon white pepper powder
- 1 tablespoon rice vinegar
Nutritional Information
- Calories: 346 kcal
- Protein: 17g
- Carbohydrates: 22g
- Fat: 22g
- Fiber: 2g
- Sodium: 710mg
- Sugar: 6g
Directions
1. PREP THE PANEER
1. If the paneer feels soft, place the block between two flat plates. Rest a heavy pot on top and press for 20 minutes. Discard any released liquid.
2. Cut the pressed paneer into uniform rectangles — approximately 2.5cm long, 2cm wide, and 1.5cm thick.
3. Spread the pieces on a clean kitchen towel or paper towel tray. Pat every surface completely dry. Leave uncovered for 5 minutes to air-dry further.
2. PREPARE ALL COMPONENTS BEFORE HEATING THE WOK
4. In one bowl, combine all sauce mix ingredients (both soy sauces, oyster sauce, chilli sauce, rice vinegar, sugar, white pepper, and water). Stir until sugar dissolves. Taste — it should be bold, slightly sour, slightly sweet, and well-seasoned. Adjust balance to your preference and set aside.
5. In a separate small bowl, make the cornstarch slurry for your chosen version (dry or gravy). Stir and set aside — do not combine with the sauce mix.
6. Mince the garlic and ginger finely. Slit the green chillies. Cut onion and bell peppers into 2.5cm squares. Slice the spring onion whites and greens separately. Have everything in individual bowls within arm's reach of the stove.
3. MAKE THE BATTER AND COAT PANEER
7. In a wide bowl, whisk together cornstarch, plain flour, egg white (or aquafaba), soy sauce, white pepper, and salt.
8. Add cold water one tablespoon at a time, whisking after each addition, until the batter is smooth, thick, and coats the back of a spoon without immediately dripping off. The consistency is closer to thick cream than to a thin wash.
9. Add the dried paneer pieces to the batter. Toss gently to coat every surface evenly. Let the battered paneer sit for 5 minutes — this allows the batter to adhere and form a slight skin.
4. FIRST FRY
10. Heat neutral oil in a deep heavy pan or wok to 170°C. Test with a small drop of batter — it should sizzle immediately, rise to the surface within 2 seconds, and turn pale golden within 90 seconds.
11. Lift each battered paneer piece individually, letting any excess batter drip back into the bowl, and lower gently into the oil. Fry 8–10 pieces per batch — do not crowd.
12. Fry for 3–4 minutes, turning once or twice, until the batter is pale golden and set firmly around the paneer. The crust should feel dry to the touch, not wet or sticky.
13. Remove with a spider strainer and drain on a wire rack — not kitchen paper. Allow the oil to return to temperature before the next batch. Repeat until all paneer is fried.
5. SECOND FRY (FOR MAXIMUM CRISPINESS)
14. Once all paneer has been first-fried, increase the oil temperature to 185°C.
15. Return all the pale-golden paneer pieces to the hot oil. Fry for 60–90 seconds until the colour deepens to a rich amber-gold and the crust sounds hollow when tapped with a spoon.
16. Remove immediately and drain on the wire rack. Set aside. The paneer can rest at this stage for up to 1 hour before wok-tossing — it holds its crust well at room temperature.
6. HEAT THE WOK AND COOK THE AROMATICS
17. Place a wok or wide, heavy pan over maximum heat. Heat the empty wok for 90 seconds — until you see very faint wisps of smoke rising from the surface. This is the signal that the wok is hot enough.
18. Add 2 tablespoons of neutral oil to the hot wok. Swirl to coat the surface evenly. The oil should shimmer immediately.
19. Add the minced garlic, ginger, and spring onion whites all at once. Stir-fry continuously for 30 seconds — they should sizzle aggressively, smell intensely fragrant, and turn very lightly golden. Do not let them burn.
20. Add the slit green chillies. Stir-fry for 15 seconds
7. COOK THE VEGETABLES
21. Add the onion squares. Stir-fry over maximum heat for 60 seconds — the edges should just begin to char while the centres remain crisp.
22. Add the green and red bell pepper squares. Stir-fry for 90 seconds. The peppers should be bright in colour with very faint char marks at the edges — not soft, not limp. This is the visual cue that they are at the correct stage.
8. ADD THE SAUCE
23. Give the sauce mix bowl a quick stir. Pour the entire sauce mix into the wok. It will bubble and spit immediately — this is correct.
24. Stir to combine with the vegetables. Allow to come to a full, rapid boil for 30–45 seconds.
9. ADD THE CORNSTARCH SLURRY
25. Give the cornstarch slurry a final stir in its bowl (it settles quickly). Add it to the wok in a thin, steady stream while stirring the sauce constantly.
26. For dry version: add half the slurry, stir for 30 seconds, and assess. The sauce should thickly coat the vegetables with minimal pooling liquid at the base of the wok. Add the remaining slurry only if needed for a thicker coating.
27. For gravy version: add all the slurry, stirring constantly for 45–60 seconds until a smooth, glossy, flowing sauce forms that coats the back of a spoon.
10. RETURN THE PANEER
28. Add the double-fried paneer pieces to the wok. Using a wok spatula, toss and fold gently — do not stir aggressively, which would break the crust. The goal is to coat every piece in sauce while keeping the crust intact.
29. Toss for 60 seconds maximum over high heat. The sauce should cling to and gloss each piece of paneer.
11. FINISH AND SERVE
30. Remove from heat immediately. Add sesame oil. Toss once to distribute.
31. Add the spring onion greens. Toss once more.
32. Transfer to the serving bowl or plate immediately — do not leave in the wok, as residual heat will continue cooking the vegetables and softening the paneer crust.
33. Garnish with additional spring onion greens, toasted sesame seeds, and thin red chilli slices. Add a drizzle of sesame oil for gloss.
34. For party serving, insert cocktail toothpick skewers into 4–5 pieces.
35. Serve within 5 minutes of plating for maximum crunch.
Rate this Recipe
User Reviews
No reviews yet. Be the first to share your thoughts!