Medu Vada Recipe Easy & Crispy
Medu Vada is a popular South Indian breakfast snack of crispy, fluffy fritters made from spiced urad dal batter, served with sambar and chutney.
 RUKAIYA KADIWAL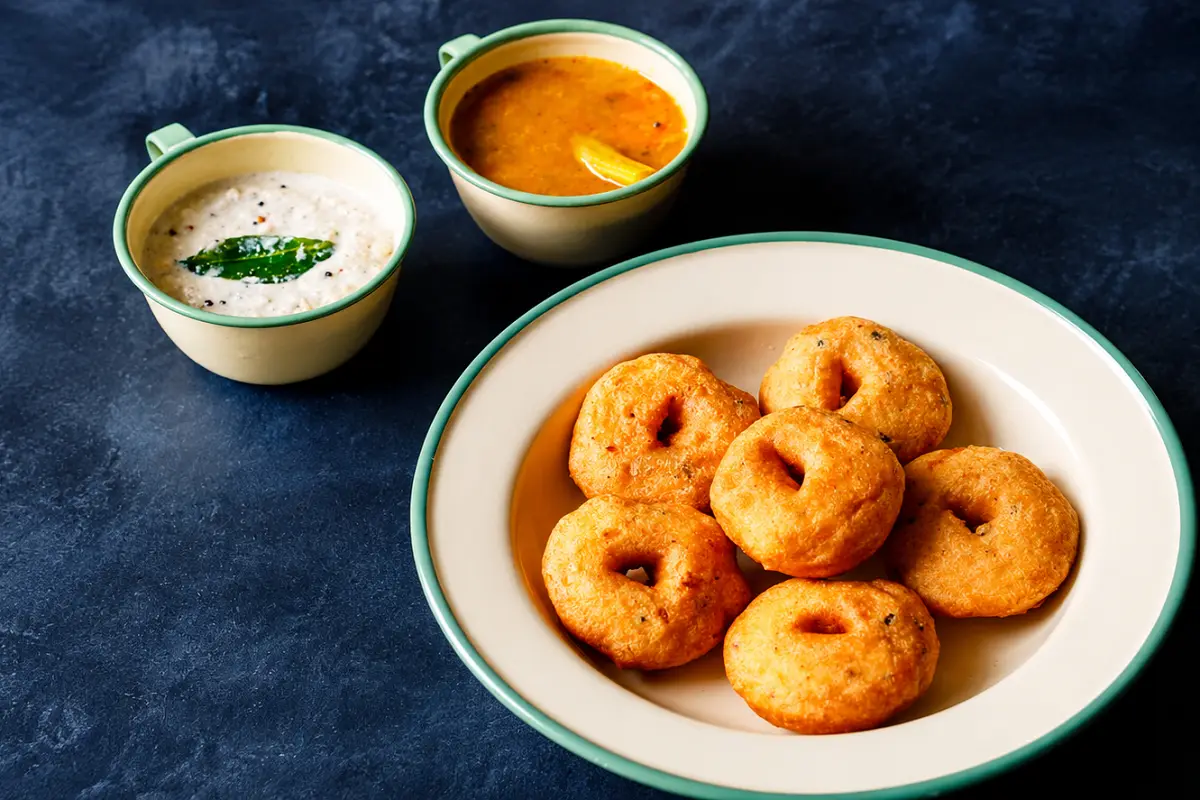
Medu Vada is a popular South Indian breakfast snack of crispy, fluffy, donut shaped fritters made from spiced urad dal (black gram) batter. These savory lentil donuts are deep-fried until golden and traditionally served with hot Sambar and fresh Coconut Chutney. Light inside, crispy outside, medu vada is comforting, filling, and always satisfying.
About Medu Vada
Vada is a broad term for Indian fried snacks made from lentils, legumes, vegetables, or sago. You'll find many types across India Sabudana Vada, Dahi Vada, Maddur Vada, Dal Vada, Batata Vada, each with its own texture and flavor.
Medu Vada is the most popular among them. The word medu means soft in Kannada, and vada means fritter. Made with urad dal (skinned black gram), it's crisp on the outside and soft and fluffy inside.
These South Indian lentil fritters are also called garelu (Telugu), uzhunnu vada (Malayalam) , uddina vada (Kannada), and medhu vadai (Tamil). You'll find them served for breakfast or as a snack in homes and tiffin centers all over South India.
Growing up, I loved medu vada for breakfast, often made on weekend mornings. Even today, it's one of my favorite South Indian tiffin snacks to cook.
What Makes Medu Vada Special
The hero ingredient here is urad dal. When soaked and ground correctly, it gives the batter a light, aerated texture.
Curry leaves, ginger, coconut, and green chillies add a lovely savory flavor. In hotel-style versions, chopped onions bring mild sweetness.
If you're making these for kids, mix in some grated carrot, cabbage, or beetroot. They add color and a bit more nutrition.
I usually enjoy medu vada the traditional way, sometimes with sambar, other times just with chutney. They're delicious either way.
You can also serve medu vada plain with coriander chutney or even tomato ketchup when you want something quick.
A Few Words Before You Begin
Getting that perfect doughnut shape takes a little practice. Don't worry if your first few aren't perfect, they'll still taste great.
With the right batter consistency and oil temperature, you'll get medu vada that are crispy outside, soft inside, and light as air.
Now, let's start making these delicious medu vada step by step with all my tried and tested tips.
Want more delicious South Indian breakfast tiffin recipes? Try my Idli , Dosa, Upma or Masala Dosa!
How to make Medu Vada
Making medu vada at home is simple once you get the batter and shaping right. Start with good quality urad dal and always use fresh oil for frying.
Follow the steps carefully, and you'll get medu vadas that are crispy on the outside and soft inside. For the complete original step-by-step method with photos, you can also refer to the original Medu Vada Recipe on Veg Recipes of India.
Additional Article Sections
Serving Sambar Vada
Medu vada tastes best when served with hot sambar and coconut chutney. You can make any sambar you like a classic vegetable Sambar, Hotel Style Sambar with fresh ground masala, or simple Onion Sambar.
If you have drumsticks or small onions, add them for more flavor for a Drumstick Sambar. Even a plain lentil sambar without vegetables tastes great with crispy vadas. If you enjoy exploring more South Indian breakfast options, you may also like this Onion Dosa (Hotel Style) Recipe.
Dassana's Recipe Tips
Use fresh urad dal: Old or aged dal doesn't grind well and can make the vadas dense. Choose unpolished urad dal for better texture and taste.
Grind to the right consistency: The batter should be smooth, light, and fluffy; similar to thick whipped cream or a soft cake batter. There should be no grits or coarse pieces.
Thin batter tip: If the batter turns thin, add a small amount of urad dal flour, rice flour, or fine semolina (rava). This thickens the batter and helps make the vadas crisp.
Flavor variations: Mix in any of these cumin seeds, crushed black pepper, green chilies, curry leaves, coriander or mint leaves, and ginger.
For fasting (vrat): Skip onions and keep spices simple.
Scaling: You can easily double or triple this recipe for gatherings or festivals.
Dassana's Notes
Use fresh urad dal - Old or aged lentils don't grind well and make dense vadas.
Grind with very little water , Add just enough to get a thick, fluffy batter.
Check batter texture , It should be light, airy, and hold shape when scooped. Do the water test as mentioned above in the stepwise photo guide to check the fluffiness of the batter.
Add rice flour or rava if the batter is thin , Helps fix runny batter and makes vadas crisp.
Fry in moderately hot oil , Too hot will brown quickly; too cool makes them greasy.
Shape with wet hands , Keep a small bowl of water nearby; it prevents batter from sticking.
Add spices and herbs just before frying , This keeps the batter thick and prevents it from turning watery.
Test one vada first , Fry a small portion of the batter to check oil temperature and consistency before frying the full batch.
Ingredients
- 1 cup or (200 grams) urad dal (hulled & split or whole hulled black gram)
- 2.5 to 3 cups water – for soaking lentils
- 3 to 4 tablespoons water – or as needed, for grinding or blending lentils
- ½ teaspoon cumin seeds
- ½ teaspoon black peppercorns – whole or crushed
- 1 tablespoon curry leaves – chopped, or 7 to 8 curry leaves
- ⅓ cup onions – finely chopped, optional
- 1 teaspoon green chilies – chopped, or 1 to 2 green chilies
- 1 teaspoon ginger – finely chopped
- 1 pinch asafoetida (hing), optional
- ¼ cup coconut – chopped, optional
- 2 tablespoons coriander leaves – chopped, optional
- ½ teaspoon salt or add according to taste
- oil – for deep frying, as needed
Nutritional Information
- Calories: 72kcal
- Carbohydrates: 8g
- Protein: 4g
- Fat: 3g
- Saturated fat: 1g
- Polyunsaturated Fat: 1g
- Monounsaturated Fat: 3g
- Sodium: 89mg
- Potassium: 5mg
- Fiber: 3mg
- Sugar: 1mg
- Vitamin A: 86IU
- Vitamin B1 (Thiamine): 1mg
- Vitamin B2 ( Riboflavin): 1mg
- Vitamin B3 ( Niacin): 24mg
- Vitamin B6: 1mg
- Vitamin C: 43mg
- Vitamin E: 1mg
- Vitamin K: 1µg
- Calcium: 21mg
- Vitamin B9 ( Folate): 248µg
- Iron: 1mg
- Magnesium: 2mg
- Phosphorus: 1mg
- Zinc: 1mg
Directions
How to Make Medu Vada ( step by step)
Step 1: Soak Lentils & Make Urad Dal Batter
Rinse 1 cup urad dal (husked and split or whole black gram) a few times in water. Then soak the lentils in 2.5 to 3 cups water for at least 4 to 5 hours or up to overnight.
Preferably use unpolished urad dal to make this vada recipe.
Drain and discard the water. Add the soaked urad dal to a grinder jar. Add 3 to 4 tablespoons fresh water or as needed. Just be sure not to make the batter too thin!
Do not add too much water while grinding. The batter should be like a soft moist dough but yet light and fluffy.
It should end up looking like a cake batter rather than a crepe batter. I recommend blending in steps and adding water as needed to achieve the right consistency.
Begin to grind or blend the urad dal to a smooth batter. The batter should be fluffy and thick.
You can grind in two batches or one lot depending on the capacity and size of your blender or mixer-grinder.
Scrape down the sides of the blender as you go to ensure all the lentils gets blended to a uniform consistency.
Continue to grind at intervals by scraping the sides with a spatula. If your mixer or grinder becomes hot, then wait for a few minutes until it cools down.
Continue to grind or blend until you achieve a smooth, fluffy batter. Remember there should be no fine grits or chunks of urad dal in the batter.
Remove the batter into a big bowl or vessel. Then briskly whip with a spatula, spoon or a wired whisk for 2 to 3 minutes. This aerates the batter and gives it a light, fluffy texture.
In the below photo you see the vada batter that has been aerated by continuously whisking it for few minutes.
Step 2: Check Batter Consistency
A quick way to check the perfect and right consistency of the batter is to add a small spoon of it in a bowl of water. The batter should float and remain intact. If it floats and does not get dissolved, then you have achieved the right consistency.
In case it sinks, this means that your batter is not fluffy enough (with not enough air bubbles trapped in it) or is too thin.
If the batter is too thin, then add some semolina (fine rava or suji) or urad dal flour or rice flour to it to help thicken it up. Rava or suji also helps in giving a crispy texture to the vada.
Step 3: Add Spices, Herbs to Vada Batter
Measure and keep all the ingredients ready for making the batter. To the batter, add the following spices and herbs:
1 tablespoon chopped curry leaves
1 teaspoon finely chopped green chillies
1 teaspoon finely chopped ginger
1 pinch asafoetida
½ teaspoon cumin seeds
½ teaspoon lightly crushed black pepper – can use whole peppercorns as well. The addition of black pepper gives a good taste but is optional.
½ teaspoon salt or as required
You can also add ⅓ cup finely chopped onions or shallots, 2 tablespoons of chopped coriander leaves and ¼ cup chopped fresh coconut pieces.
Mix the batter well with the herbs, spices and salt. Check the taste of the batter and, if needed, add some salt.
You do not have to ferment the batter. You can use it right away.
Step 4: Shape Batter
Take a bowl of water. Apply some water from the bowl on both your palms.
Take some batter in your right palm from the bowl. Give it a round shape by moving it in a circular position in the right hand.
With your thumb make a hole in the center. You can also use banana leaves or zip lock bags to give the medu vada its doughnut shape.
Tip: If the batter sticks and you are not able to shape it then add 1 to 2 tablespoons of rice flour to the batter and mix well. This happens if the batter has become slightly thin which means that there is more water in it.
Step 5: Make Medu Vada
In a kadai, heat oil over medium heat. Once the oil becomes hot, slide the medu vada gently into the hot oil.
Do not overcrowd the pan. Work in batches, considering the size of your pan as your guide.
Note: Be careful here! The oil can sputter and pop over quite a distance, so I recommend wearing an apron and long sleeves to protect your skin and clothes.
Tip: If you do not care about the appearance of the doughnut shape of the medu vada, then just drop spoonfuls of the batter directly in the oil.
Once the vada or garelu are slightly golden and the batter has firmed up and looks crispy, then gently turn over with a slotted spoon and continue to fry.
The oil should not exceed 190 degrees celsius (375F), or fall below 175 degrees celsius (350F).
Tip: Oil that is too hot will quickly brown the vada from the outside, but they will remain uncooked from inside. Oil that isn't hot enough will make the vada absorb too much oil and become greasy.
Continue to fry the vada, turning over as needed.
Fry the medhu vadai till crisp and golden.
Once the medhu vadai is crisp and golden, then remove with a slotted spoon to drain the extra oil. Fry the rest of vadai in the same manner.
Drain them on kitchen tissues to remove extra oil. This way shape the vada batter and fry them batches in hot oil.
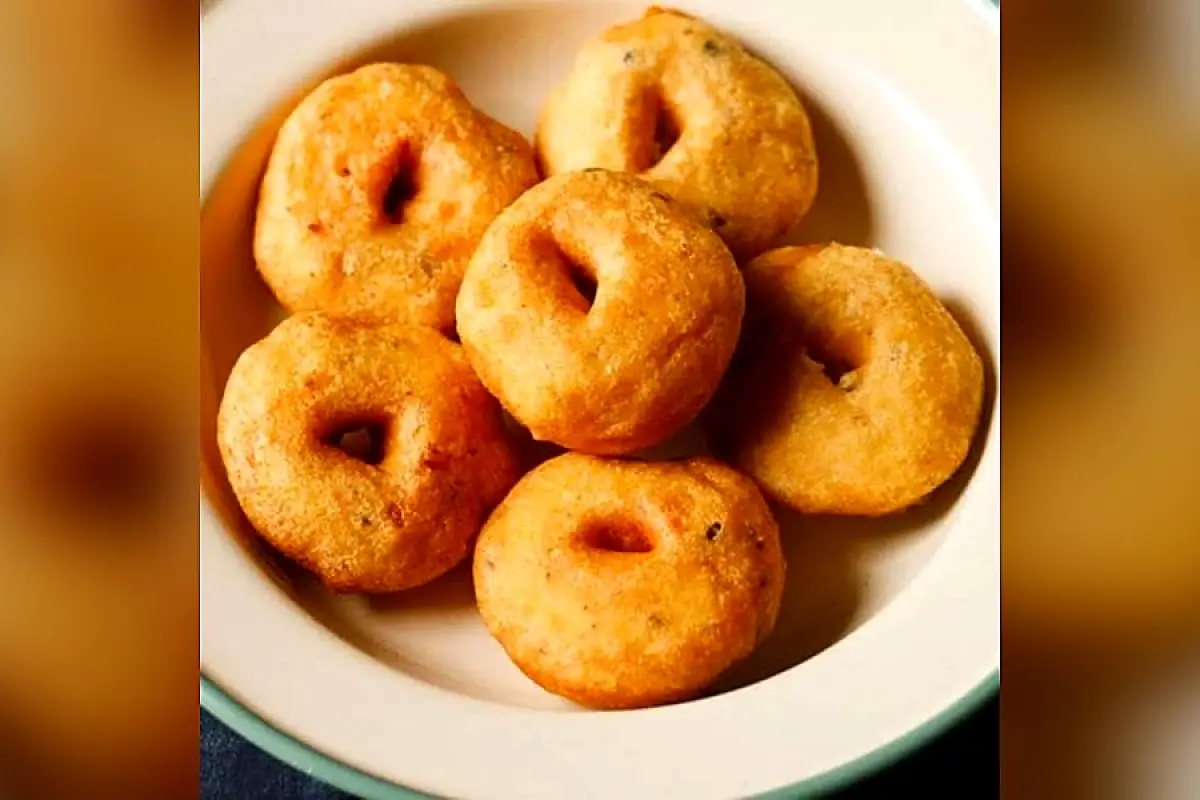
Serve medu vada hot or warm with sambar or chutney of your choice. You can also pair these vadas with Tomato Chutney or Onion Chutney.
Any leftover batter can be refrigerated in an airtight container and used within one day. Bring it to room temperature before frying, and avoid thinning it with water after chilling.
Rate this Recipe
User Reviews
No reviews yet. Be the first to share your thoughts!